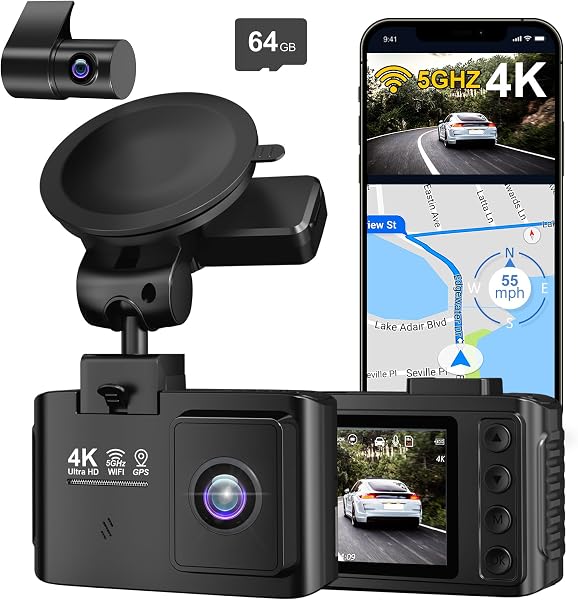
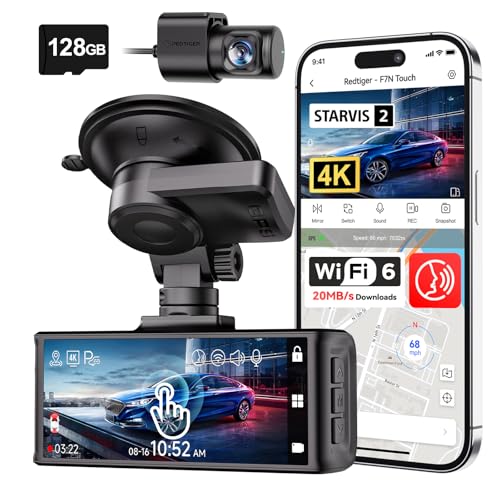
Mastering drive cam placement rules for driver view is essential for safety, and this guide provides 10 actionable tips to ensure your setup is both legal and effective. By following these professional installation guidelines, you can optimize your visibility while minimizing potential obstructions.
Proper camera positioning is not just about recording; it is about compliance with local visibility laws and maintaining a clear line of sight for the operator. This guide simplifies the process to keep your windshield clutter-free and your dash cam performance at its peak.
Tip 1: Identify Optimal Mounting Zone

The Primary Cabin Center
Positioning your camera near the rear-view mirror is the industry standard. This location offers the most balanced perspective of the road ahead.
Clearing the Sensor Array
Ensure you avoid placing the camera directly over modern vehicle sensor housings, as this can interfere with factory safety features like rain-sensing wipers or lane departure cameras.
Tip 2: Aligning to Drive Cam Placement Rules for Driver View
Line of Sight Coordination
When adhering to drive cam placement rules for driver view, prioritize mounting the device so it does not intersect with your primary peripheral vision. Ideally, tuck the unit behind the mirror so the driver cannot see the lens body while actively operating the vehicle.
Height Adjustments
Mount the camera as high as possible on the glass to maintain the widest possible perspective while keeping the hood of the car at the bottom edge of the frame.
Tip 3: Avoiding Windshield Wiper Obstructions

Wipe Path Awareness
Place your camera within the sweep area of your windshield wipers. If you mount it outside the wiper reach, rain, snow, and dirt will obscure your footage during inclement weather.
Testing the Sweep
Engage your wipers before final adhesion to confirm the camera lens is situated within the "clear zone" of the blade rotation.
Tip: Always clean the interior glass with isopropyl alcohol before mounting to ensure the adhesive bond survives seasonal temperature fluctuations.
Tip 4: Minimizing Interior Reflections

Polarizing Filter Usage
To reduce dashboard reflections on the windshield, install your camera as close to the glass as possible. Using a CPL (Circular Polarizer) filter can further help if you are struggling with glare.
Matte Surfaces
If your dashboard is highly reflective, consider a non-slip dash mat to reduce the light cast upward onto your windshield, which can ruin high-contrast recordings.
Tip 5: Maintaining Legal Visibility Clearance

Checking Local Regulations
Always verify local drive cam placement rules for driver view, as some jurisdictions have strict laws regarding how many square inches of the windshield may be obstructed.
The "Right-Side" Benefit
In many regions, mounting the device on the passenger side of the rear-view mirror is legally preferred to keep the driver's side clear of any potential distractions.
| Mounting Position | Visibility Impact | Legality Score |
|---|---|---|
| Behind Mirror | Minimal | High |
| Lower Dashboard | High | Low |
| Passenger Corner | Negligible | High |
Tip 6: Calibrating Drive Cam Placement Rules for Driver View
Step-by-Step Calibration
Warning: Avoid installing in a position where the airbag deployment path might turn the camera into a projectile during an impact.
Tip 7: Cable Management for Safety
Routing Techniques
Loose cables are a safety hazard. Always tuck excess wire into the headliner and along the A-pillar trim to ensure cables do not hang in the driver’s line of sight.
Professional Trim Tools
Use a plastic trim removal tool to gently pry back interior panels, ensuring you do not damage your vehicle's interior finish or press against airbag sensitive zones.
Tip 8: Considering Passenger Side Mounting
Reducing Cognitive Load
For drivers who find screen distractions problematic, mounting to the right of the center line is a great way to comply with drive cam placement rules for driver view. This keeps the tech out of the primary sightline while still capturing a full view of the road.
Multi-Camera Considerations
If you are running a multi-channel system, ensure your secondary units are also tucked away safely to prevent glare or accidental knocks from passengers.
Tip 9: Checking Drive Cam Placement Rules for Driver View
Sensor Blockage Check
Periodically inspect the area around your camera to ensure it has not shifted. Excessive heat can sometimes cause adhesive mounts to sag over time.
Dynamic Recalibration
Some advanced cameras require a reset if they are moved significantly. Always perform a quick software check after adjusting your mount position to ensure the internal sensors remain accurate.
Success: Using a static cling film between the windshield and the adhesive mount allows for easy repositioning without leaving sticky residue behind.
Tip 10: Final Field-of-View Verification
The Real-World Test
Perform a test drive on a well-lit road to check for distortion at the edges of the frame. A slight adjustment of the camera angle can significantly improve the capture of peripheral activity at intersections.
Archiving Settings
Once you are happy with the placement, save your position and ensure the mounting screws are tightened to prevent "vibration blur" during higher speeds.
Common Mistakes to Avoid
1. Blocking the driver's view: Never mount the camera so low that it cuts into your vision of the road or traffic lights.
2. Ignoring tint strips: Do not mount your camera over aftermarket windshield tint strips as they may degrade the adhesive or distort the image.
3. Cable entanglement: Never route cables across the steering wheel or pedals, as these can interfere with critical vehicle controls.
Frequently Asked Questions
How high should my dash cam be?
A: It is generally recommended to mount the camera in the top third of the windshield to maximize visibility and minimize distractions.
Is it illegal to mount a camera on the windshield?
A: Laws vary, but most regions allow it provided it does not obstruct the driver's vision or interfere with airbags.
Can I use suction mounts?
A: Suction mounts are convenient but can lose grip over time in extreme heat; adhesive mounts are generally more reliable for long-term placement.
What if my car has a rain sensor?
A: Avoid placing the camera housing directly over the rain sensor module, as this can confuse the vehicle's automatic wiper system.
How do I clean the mounting area?
A: Use a microfiber cloth with a small amount of rubbing alcohol to remove grease and oils from the glass surface before installation.
Can the camera see through window tint?
A: While it can see through most light tints, dark aftermarket film can reduce low-light recording quality significantly.
Should the camera be centered?
A: Centering the lens relative to the vehicle width provides the most symmetrical view of the road, though passenger-side mounting is often acceptable.
Does the camera affect my insurance?
A: Some insurers offer discounts for dash cams, but only if they are installed safely and do not compromise driver safety.
Key Takeaways
- 1 Always position the camera behind or near the rear-view mirror for the best perspective.
- 2 Ensure the device is within the wiper sweep zone to maintain clear video in rainy weather.
- 3 Check your local windshield obstruction laws to maintain full legal compliance.
- 4 Use proper cable management tools to keep wires out of the driver's sight.
- 5 Prioritize passenger-side mounting if you are prone to distraction by tech.
- 6 Clean the windshield thoroughly to prevent the camera from falling due to adhesive failure.
- 7 Periodically verify the horizon level of your camera to ensure consistent footage quality.
Conclusion
Effective dash cam installation is a balance between recording accuracy and driver safety. By prioritizing clean mounting, proper cable management, and adherence to legal guidelines, you ensure your technology serves its purpose without becoming a hindrance.
As you move forward with your installation, remember that consistency is key. Keep your setup inspected for stability and keep your lens clear of obstructions for the best security results.
Take the time to do it right, and your dash cam will provide reliable protection for years to come.