When evaluating whats the average cost to install front and rear cameras, owners generally weigh two distinct paths: professional installation services versus a do-it-yourself (DIY) approach.
Determining the financial investment for dash cam integration often leads to confusion, as costs vary drastically based on vehicle complexity, technician hourly rates, and the specific wiring requirements of the camera hardware. Many drivers struggle to calculate the "hidden" costs, such as the value of their time or the potential for wiring errors during a self-install.
This guide breaks down the financial and practical considerations of professional versus DIY installation. By the end, you will be able to determine which route aligns with your budget, technical comfort level, and the requirements of your specific vehicle setup.
- Upfront hardware costs vs. service labor fees
- Complexity of running cables for rear-facing cameras
- Risk factors and warranty implications
- Time investment for professional vs. DIY
- Long-term reliability and hidden maintenance costs
Overview & Head-to-Head Summary

Professional Installation Services
Professional installation involves hiring an automotive electronics technician to hardwire your front and rear cameras into the vehicle’s fuse box. This method ensures wires are concealed behind headliners and trim panels, providing a clean, "factory-installed" aesthetic.
DIY Self-Installation
DIY installation requires the owner to manage the mounting, cable routing, and power connection manually. While this method significantly lowers the labor cost, it requires patience and a basic understanding of automotive trim removal and electrical systems.
| Feature | Professional | DIY |
|---|---|---|
| Labor Cost | $150 - $400 | $0 |
| Time Required | 2 - 4 hours | 4 - 8+ hours |
| Appearance | Professional/Hidden | Variable |
| Risk Level | Low | Moderate |
Before beginning, check if your camera setup requires 24/7 security features, as these often complicate the wiring process regardless of the installation method chosen.
Key Differences & Core Features

Architectural Complexity and Wiring
The core difference in cost stems from cable management. Running a rear-facing camera cable requires threading through rubber conduits and potentially dismantling interior panels. Professionals have specialized tools for these tasks, whereas DIYers may struggle with brittle plastic clips.
Hidden Costs and Tools
While DIY seems free, it often necessitates the purchase of hardwire kits, trim removal tools, and fuse taps. Professionals factor these into their quote, while DIYers must account for them as out-of-pocket expenses that can quickly close the gap in total cost.
| Dimension | Professional | DIY |
|---|---|---|
| Tools Needed | Provided by shop | Must purchase/borrow |
| Warranty | Often includes labor guarantee | Voided if user damages car |
| Integration | Seamless fuse taps | Often relies on cigarette plug |
Understanding these factors is essential, similar to how one might research wired vs. wireless configurations to minimize installation headaches.
Performance & Real-World Analysis

Assessing Installation Quality
Performance in the real world is tied to power consistency. A poor DIY job can lead to loose connections or cameras that lose power over bumps. Conversely, a professional install usually involves high-quality heat shrink and secure routing that prevents wire fatigue.
Evaluating Long-Term Reliability
To gauge the long-term viability, you must consider the environment. Vehicles with complex electronic systems (like luxury EVs) might benefit from professional oversight to prevent interference with sensitive sensors.
Reliability is highest when connections are soldered or secured with professional-grade crimps, regardless of who performs the task.
Best Use Cases & Ideal Scenarios
When Option A (Professional) Makes More Sense
Professional installation is ideal for newer, high-end vehicles with extensive interior trim and sensitive airbag systems. It is also the preferred choice for those who lack the time or mechanical inclination to manage interior disassembly.
When Option B (DIY) Makes More Sense
DIY is perfect for older vehicles with simpler, forgiving interiors, or for enthusiasts who enjoy car modification. It is the most cost-effective solution for those on a tight budget who are confident working with small electrical circuits.
When It Genuinely Doesn't Matter
For temporary camera setups or vehicles intended for short-term use, the method of installation is less critical than the convenience of the camera's mounting system.
Recommended Equipment & Solution
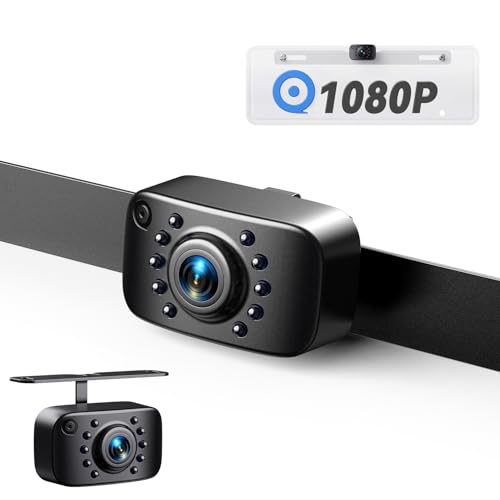
eRapta Backup Camera, AHD & CVBS License
A reliable pick for eRapta Backup Camera, AHD, selected based on this article's guidance.
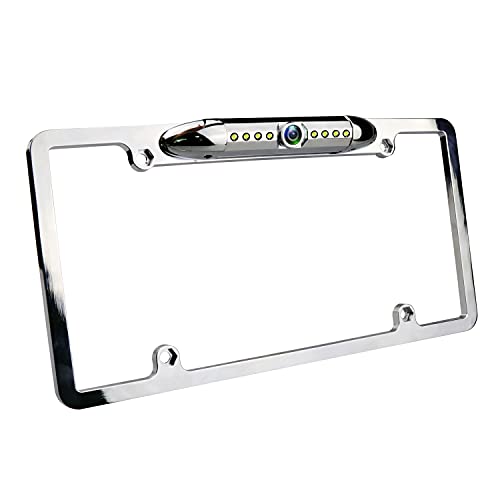
License Plate Backup Camera, JPP Front/Rear View
A reliable pick for License Plate Backup Camera, JPP, selected based on this article's guidance.
Final Verdict & Decision Framework

Quick Decision Checklist
If your budget is under $100 and you have basic hand tools, DIY is the clear winner. If you value your time and have a vehicle worth more than $30,000, the peace of mind offered by professional installation is usually worth the premium.
Our Framework for Choosing
| Goal | Recommended Path |
|---|---|
| Minimize Total Cost | DIY |
| Preserve Interior Integrity | Professional |
| Fast Completion | Professional |
| Learning Experience | DIY |
Frequently Asked Questions
Does the cost to install cameras vary by city?
A: Yes, labor rates in metropolitan areas are significantly higher due to higher shop overhead and demand.
Will a shop install a camera I bought online?
A: Most audio-video shops will install customer-provided hardware, though they may charge a premium or offer no warranty on the device itself.
How long does an installation usually take?
A: For most standard sedans, a dual-camera system takes approximately 2 to 3 hours for a qualified technician to complete.
Is hardwiring dangerous for the car's electronics?
A: When done correctly using proper fuse taps, hardwiring is safe; however, improper wiring can lead to battery drain or blown fuses.
Should I ask for a quote before arriving?
A: Absolutely; always request an estimate in writing that covers labor and any auxiliary parts like hardwire kits or mounting supplies.
Are there hidden costs like disposal fees?
A: Typically, no, but ensure your quote covers the removal of any old camera systems if you are upgrading.
Does vehicle size affect installation cost?
A: Yes, SUVs, trucks, and minivans often require longer cables and more complex routing, which can increase labor costs.
Can I lose my factory warranty by installing a dash cam?
A: Generally, standard plug-in dash cams won't void warranties, but hardwiring into the fuse box should be discussed with your dealer if you are concerned.
Key Takeaways
- 1 Professional installation typically ranges from $150 to $400 depending on complexity.
- 2 DIY installation cost is effectively zero, excluding the price of tools and accessories.
- 3 Always account for hidden costs like hardwire kits and trim removal tools in your budget.
- 4 Vehicle age and interior trim design are the biggest predictors of installation difficulty.
- 5 Professional services offer labor guarantees that DIY cannot provide.
- 6 Safety should always be prioritized, especially regarding airbag clearance during cable routing.
- 7 Compare at least three local shops if you decide to go the professional route.
Conclusion
Deciding between professional installation and a DIY approach is a balance of your available time, technical confidence, and the specific needs of your vehicle. While the upfront savings of DIY are enticing, the professional finish and potential time savings often make paid services a compelling choice for many drivers.
Evaluate your comfort level with vehicle interior components before committing. If you are uncertain about navigating your fuse box, the cost of professional labor is often a small price for the assurance of safety and reliability.
Regardless of the path chosen, ensure your setup allows for reliable operation so you can drive with confidence, much like you would when integrating a specialized baby monitoring system.