Knowing how to reattach the car dashcam correctly is essential to ensuring your device remains stable and provides a clear, vibration-free field of vision for safety.
This guide is designed for vehicle owners who need to remount a dash camera after a windshield repair, vehicle sale, or adhesive failure. It assumes a basic level of comfort with handling small electronic accessories and automotive adhesive products.
By the end of this guide, you will be able to select the appropriate mounting materials, prepare the surface for optimal adhesion, and securely reattach your device for long-term reliability.
- Understanding the limitations of various adhesive types.
- Proper windshield surface preparation techniques.
- Step-by-step guidance on how to reattach the car dashcam safely.
- Testing procedures to ensure stable recording angles.
- Troubleshooting common mounting failures and vibration issues.
Overview & Prerequisites

What You'll Need
To successfully perform this task, you will need high-quality automotive-grade double-sided tape (typically 3M VHB), isopropyl alcohol for surface cleaning, a microfiber cloth, and a plastic pry tool if you need to remove old mounting residue. Having the right tools ensures that you do not damage your windshield tint or the camera housing.
Who This Guide Is For
This guide is for DIY enthusiasts who want to maintain their vehicle's safety features without paying for professional installation. Before beginning, consult How much installing a dash camera costs: A Complete Pricing Guide to determine if your current hardware is worth the reattachment effort.
Always wait for the temperature inside your vehicle to reach a moderate level before applying new adhesive, as extreme cold or heat can prevent the bond from setting properly.
Core Concepts & Fundamentals

Surface Tension and Bonding
The success of reattaching a dashcam relies heavily on surface energy. If the glass has residue from previous adhesives or oily films from interior cleaners, the new bond will fail prematurely. Understanding that 3M VHB tape is pressure-sensitive is crucial; it requires sustained pressure to activate the adhesive molecules.
Angle Alignment Principles
Reattaching the camera involves more than just sticking it back to the glass. You must ensure the lens is aligned with the horizon. Learning How are dash cams powered? The complete guide to installation methods can help you route the cabling so that it doesn't pull on the camera mount after you have reattached it.
| Scenario | Best Practice | Common Error |
|---|---|---|
| Surface Cleaning | Use 90% Isopropyl Alcohol | Using window cleaner with ammonia |
| Mounting | Firm, consistent pressure for 30s | Applying and moving immediately |
| Environment | Room temperature application | Applying in freezing weather |
Step-by-Step Execution Guide

Preparation Phase
Begin by carefully removing all old adhesive residue from both the windshield and the camera mount using a plastic scraper. Clean the glass with isopropyl alcohol until no smudges remain. Ensure that your power cables are managed correctly, as discussed in Do dash cams record when the car is off? Everything You Need to Know for 24/7 Security.
Installation Phase
Recommended Equipment & Solution

Sticky Adhesive Pads for Dash Cam Mount
A reliable pick for Sticky Adhesive Pads for Dash, selected based on this article's guidance.

Adhesive Sticky Pads for Dash Cam Mount
A reliable pick for Adhesive Sticky Pads for Dash, selected based on this article's guidance.
Best Practices & Pro Tips

Environmental Considerations
Adhesive strength is highly dependent on ambient temperature. If you are reattaching the device in winter, use a hair dryer to warm the windshield glass slightly before application. This promotes better "wet-out" of the adhesive.
Long-Term Maintenance
Regularly inspect the mount every few months during routine vehicle cleaning. Heat cycles from the sun can soften some lower-grade tapes over time, potentially causing the device to droop or shift during driving.
Troubleshooting & Common Pitfalls
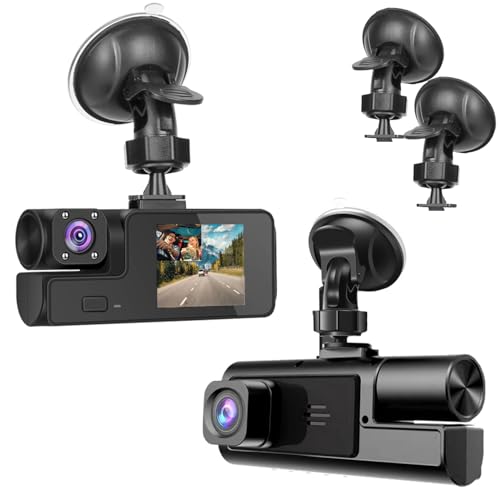
Failure Mode Analysis
If your mount keeps falling, it is almost always due to surface contamination or insufficient pressure during the initial set. For more complex issues, visit Baby Car Camera Mounting Tips: Secure Setup Guide 2026 to see if your mount is compatible with your specific glass curvature.
Fixing Common Issues
Frequently Asked Questions
Can I reuse the old adhesive?
A: No, old adhesive loses its cross-linking properties and will not provide a secure bond. Always replace it with fresh material.
How long does it take for the glue to set?
A: While it adheres quickly, it takes 24 to 72 hours for the chemical bond to reach maximum strength.
Will rubbing alcohol damage my windshield?
A: No, isopropyl alcohol is safe for glass surfaces, but be careful not to get it on plastic dashboard trim.
Can I use super glue instead?
A: Definitely not, as super glue is brittle and will shatter under the stress of vibrations and temperature changes.
Is there a difference between internal and external tape?
A: Yes, always use automotive-rated tapes designed for high-temperature cycles inside vehicles.
What if my windshield has a heater grid?
A: Apply the mount carefully so you do not press too hard directly onto a wire, though standard mounting is generally safe.
Does the camera weight affect the mount?
A: Yes, heavier cameras require larger surface areas for the adhesive to distribute the load effectively.
Should I mount the camera on tint film?
A: It is best to avoid mounting directly onto aftermarket tint film as the weight may cause the film to bubble or peel.
Key Takeaways
- 1 Always use fresh automotive-grade adhesive.
- 2 Thoroughly clean the glass with isopropyl alcohol before application.
- 3 Apply firm pressure for at least 30 seconds to activate the tape.
- 4 Allow the adhesive to cure for 24 hours before mounting the camera unit.
- 5 Avoid mounting directly over tint film to prevent peeling.
- 6 Use a bubble level to ensure the camera is perfectly horizontal.
- 7 Periodically check the mount for signs of sagging or movement.
Conclusion
Reattaching a dashcam is a straightforward process when approached with patience and the right materials. By prioritizing surface preparation and following the curing requirements of your adhesive, you can ensure a long-lasting, stable mount that keeps your footage clear and reliable.
If you find that your current mounting hardware is consistently failing, it may be time to upgrade to a more robust suction or bracket-based system. Continue to refine your setup to maintain your vehicle's safety standards effectively.
A secure dashcam is your silent witness on the road; take the time to mount it right the first time.