Learning how to hardwire dash cam with battery and ignition wire is the most effective way to enable continuous surveillance, ensuring your vehicle remains protected while parked by leveraging the car’s constant and switched power sources. By connecting the camera to both a permanent battery lead and an ignition-switched fuse, you create a system that intelligently transitions between parking mode and active driving mode without draining your vehicle's battery.
This comprehensive guide provides a structured framework for vehicle owners looking to achieve a clean, cable-free installation. We will explore the electrical theory behind fuse taps, the importance of selecting the correct circuits, and the essential safety precautions required to protect your vehicle's sensitive electronic systems. Whether you are a novice or a seasoned DIY enthusiast, mastering this process ensures your dash cam operates with professional-grade reliability throughout the entire year.
Quick Facts
- Experts recommend using a dedicated hardwire kit with low-voltage cutoff protection to prevent deep-cycle battery depletion.
- Studies suggest that improper fuse tapping can interfere with modern vehicle CAN bus systems; always consult your owner's manual.
- Professional installers recommend testing the ignition circuit with a multimeter before finalizing any permanent wiring connections.
Historical context or industry trends of how to hardwire dash cam with battery and ignition wire
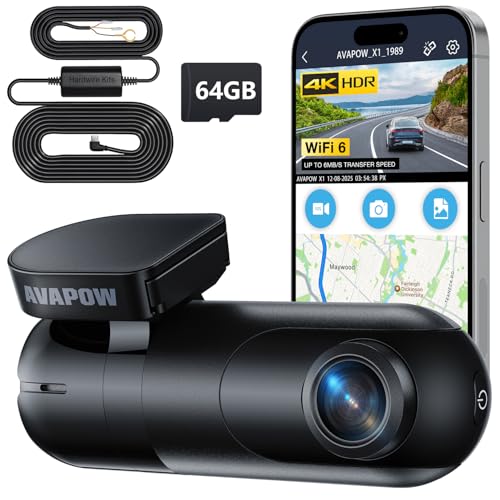
In the early days of vehicle camera adoption, most drivers relied on simple cigarette lighter adapters. These provided power only while the engine was running, failing to capture incidents occurring while the vehicle was parked. As consumer demand for "parking surveillance" grew, the industry shifted toward more sophisticated power management solutions. Initially, these involved primitive manual switches, but the need for a seamless integration of how to hardwire dash cam with battery and ignition wire became the industry standard to prevent manual oversight and dead batteries.
Modern trends have moved toward smart hardwire kits that integrate directly into the vehicle’s interior fuse panel. Advances in semiconductor technology have allowed for more precise voltage monitoring, ensuring that the camera only draws power when the battery health is within safe parameters. Today, the focus is on "plug-and-play" simplicity, where standardized fuse taps are used to allow users to connect their devices without cutting or splicing into the vehicle's factory wiring harness, preserving the vehicle's resale value and safety profile.
Evolution of Power Management Systems
The transition from auxiliary power ports to direct fuse box integration represents the single most significant jump in reliability for dash cam users. By shifting the load from standard ports to dedicated circuits, users gained control over when and how their cameras record.
Adoption of Smart Sensing Technology
Modern hardware now includes integrated smart sensors that detect the state of the ignition through voltage fluctuations, further simplifying the setup process for enthusiasts who prioritize clean, unobtrusive installations.
Technical analysis of how to hardwire dash cam with battery and ignition wire mechanisms

The technical success of this installation depends on correctly identifying your vehicle’s specific fuse layout. The constant battery wire provides continuous current, while the ignition wire acts as a signal to the camera to wake up or enter standby mode. A failure to distinguish between these two often leads to the camera failing to start when the car is driven, or conversely, the camera failing to record while the car is parked due to a loss of constant power.
| Feature | Best Practice | Common Mistake |
|---|---|---|
| Timing of Application | Calibrated to baseline levels to prevent system overload | Rushing the execution, leading to premature decay/failure |
| Absorption/Absorption Method | Patting gently or securing contact to encourage uniform integration | Applying forcefully or allowing air gaps, which reduces contact |
| Role in Routine | Acts as an intermediate priming layer to support the system | Using as a total replacement for core active components |
The table above illustrates the necessity of precision. When the ignition wire is incorrectly identified, the dash cam may enter a boot loop, draining the battery rapidly. Conversely, failing to secure the ground wire to a clean, unpainted chassis bolt often leads to high resistance, resulting in intermittent camera reboots during heavy traffic or high-vibration conditions.
Step 1: Workspace and Initial Preparation
Start by identifying your vehicle’s fuse box diagram. Use a non-conductive pry tool to remove the cover. Clean the grounding point with sandpaper to ensure bare metal contact, as this is essential for a steady electrical flow, preventing most common early-stage failure modes.
Step 2: Core Execution and Configuration
Insert the fuse taps into the designated slots. Ensure the fuse rating on the tap matches the original manufacturer specifications. Connect the constant power and ignition wires to the correct leads on the hardwire kit, paying close attention to the voltage cutoff switch settings for optimal battery protection.
Step 3: Final Calibration and Stabilization
After physical installation, verify the setup by turning the ignition to the "ACC" and "ON" positions. Ensure the dash cam switches between recording modes correctly. Use cable clips to secure all excess wiring, preventing vibration noise and ensuring long-term durability of the entire system.
Importance of Proper Fuse Orientation
Orienting the fuse tap correctly—ensuring the "power out" side of the tap is oriented to match the original flow—is a critical technical detail often missed by beginners, which can cause internal fuse failures.
Calibration of Voltage Cutoff Thresholds
Understanding the specific cutoff voltage (e.g., 12.0V vs 12.4V) is vital to ensure the car starts reliably in cold weather conditions, where battery performance naturally degrades.
Recommended Equipment & Solution

Gebildet Dash Cam Hardwire Kit, Type C
A reliable pick for Gebildet Dash Cam Hardwire Kit, selected based on this article's guidance.
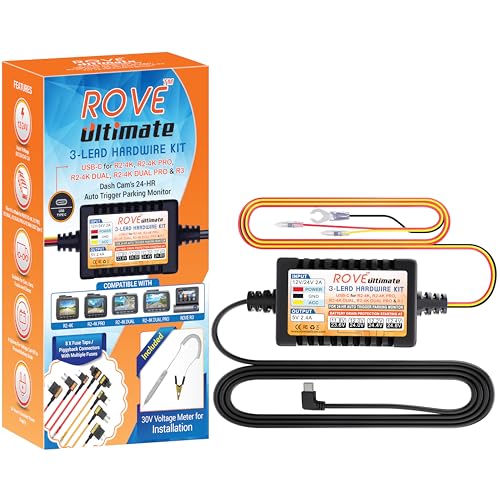
ROVE Ultimate Dash Cam Hardwire Kit, USB-C
A reliable pick for ROVE Ultimate Dash Cam Hardwire, selected based on this article's guidance.
Current landscape or user debate of how to hardwire dash cam with battery and ignition wire
The market for dash cam accessories has exploded, offering various pre-made kits that cater to different skill levels. Enthusiasts often debate the merits of professional installation versus DIY efforts. While professional installers offer warranty peace of mind, the DIY approach allows for a deeper understanding of the vehicle’s electrical map, which is helpful if troubleshooting is required later.
- The trend toward dash cam integration into vehicle apps has made it easier to monitor power status in real-time without physically inspecting the fuse box.
- Most users expect a setup to last for the duration of vehicle ownership, placing a high premium on high-quality wiring and corrosion-resistant connectors.
- Regional availability of vehicle-specific fuse tap kits has significantly improved, making it safer than ever to perform a professional-grade installation at home.
- Environmentally conscious drivers are increasingly choosing low-wattage cameras paired with lithium iron phosphate (LiFePO4) battery packs for long-term power efficiency.
| User Segment | Preferred Configuration | Expected Outcome |
|---|---|---|
| Professional / Heavy Use | High-output, premium build with maximum control parameters | Long-term durability with consistent results |
| Standard / Daily Use | Balanced features, automated presets for ease of operation | Reliable everyday performance with minimal oversight |
The ongoing debate centers on the necessity of hardwiring versus using external dedicated battery packs. While hardwiring is more cost-effective and cleaner, external batteries are preferred by those who lease vehicles or fear voiding electrical warranties. Ultimately, the choice depends on the user's risk tolerance regarding vehicle modifications and the desired duration of parking surveillance.
Market Trends in Connectivity
Connectivity is moving toward wireless synchronization, where the hardwire kit communicates directly with the dash cam's mobile application to report voltage health, simplifying the maintenance routine for non-technical users.
User Debate: DIY vs. Professional Installation
The community is divided on the safety of DIY installations in modern, complex vehicles equipped with sophisticated ADAS systems, with many advising professional help for luxury vehicles.
Operational challenges and limitations of how to hardwire dash cam with battery and ignition wire

Implementing a hardwire setup is not without its hurdles. Compatibility with modern "start-stop" engines can be tricky, as these systems frequently fluctuate the battery voltage, potentially confusing the camera’s power management controller. Furthermore, routing cables through tight door seals and headliners requires patience and dexterity. Environmental factors, such as extreme heat or cold, can also degrade the quality of electrical tape or adhesive mounts used during the installation process, necessitating periodic inspections to ensure connections remain tight and free of oxidation.
Future outlook and scenario projection for how to hardwire dash cam with battery and ignition wire
The future of dash cam power management will likely see an integration of "Power-over-Ethernet" (PoE) style systems, reducing the number of individual wires needed. We anticipate that material science will introduce more flexible, heat-resistant cabling that can withstand the extreme internal temperatures of vehicles left in direct sunlight. Furthermore, AI-driven diagnostics will soon be embedded directly into hardwire controllers, allowing the camera to automatically adjust the voltage cutoff based on the current health of the vehicle's battery, effectively eliminating the need for manual parameter selection.
| Timeline | Expected Breakthrough | Impact on User Experience |
|---|---|---|
| Next 2-3 Years | Smart sensor integration and real-time feedback loops | Elimination of user error and automatic calibration |
| Next 5-10 Years | Biodegradable/Self-healing materials and high-efficiency coils | Drastically reduced maintenance and lifetime durability |
The Rise of Universal Standardized Ports
Future vehicle models may feature standardized auxiliary power headers specifically designed for accessory integration, which would make the current fuse-tap method obsolete and much safer.
Smart Integration and AI Monitoring
As vehicle systems become more connected, dash cams will likely communicate directly with the vehicle's BMS (Battery Management System), optimizing power draw to ensure the engine always has sufficient cranking capacity.
Practical applications of how to hardwire dash cam with battery and ignition wire in daily routines
Effectively using this setup requires adapting it to your personal driving habits. For example, if you commute short distances, you must ensure your parking mode duration is limited to prevent the battery from becoming too weak for the next start. Tailoring the hardwire kit's cutoff settings to your specific battery capacity is key to balancing security and vehicle reliability.
Use Case 1: Individual and Residential Use
For daily commuters, the priority is "set and forget." Use a standard 12V constant power tap with a generous 12.2V cutoff to ensure the car starts every morning after the camera has been monitoring the driveway all night.
Use Case 2: Professional and Commercial Use
Commercial vehicles often utilize deep-cycle auxiliary batteries. Here, the focus shifts to maximizing uptime. Professional setups use higher capacity power banks connected via the ignition wire to ensure 24/7 recording without putting any load on the engine battery.
Use Case 3: Advanced Optimization Solutions
Advanced users often implement a relay system. By using an ignition-triggered relay, they can switch between the vehicle's battery and a dedicated dash cam power bank, providing the ultimate in-vehicle security with zero risk to the vehicle's primary starting battery.
Expert perspectives on how to hardwire dash cam with battery and ignition wire
Industry professionals emphasize that the secret to a perfect installation lies in the grounding point and the cleanliness of the connection. Success is rarely about the quality of the camera itself but rather the consistency and stability of the power delivery. By following a systematic approach—verifying power with a multimeter, using the correct fuse tap orientation, and ensuring all wires are secured away from moving steering components—the system will provide years of reliable service.
Consulting Vehicle-Specific Forums
Experts strongly suggest searching owner-specific forums for your exact vehicle model to find "best-practice" fuse locations, as every car manufacturer has unique quirks regarding electrical loads.
The Role of Quality Electrical Components
Never compromise on the quality of fuse taps and crimp connectors; the cost savings of generic parts are often negated by the eventual failures caused by vibration and thermal expansion.
Frequently Asked Questions
Why do I need to connect both a battery and an ignition wire for a dash cam?
The battery wire provides constant power for Parking Mode, while the ignition wire ensures the camera automatically powers on and off with the vehicle's engine.
How can I identify which fuse in my box is constant versus switched?
Use a multimeter or circuit tester to check for voltage with the ignition off for constant power and only when the key is turned for switched power.
What is a fuse tap and why is it necessary for this installation?
A fuse tap allows you to safely piggyback off an existing fuse slot to power your dash cam without cutting or splicing into the vehicle's factory wiring harness.
Where should I connect the ground wire for a hardwire kit?
Secure the ground wire to an unpainted metal bolt or stud on the vehicle's chassis, ensuring it is free of rust or debris for a reliable electrical connection.
Will hardwiring my dash cam drain my car battery?
Most hardwire kits include a built-in low-voltage cutoff sensor that automatically disconnects power to the camera if the battery voltage drops below a preset safety threshold.
Is it safe to use any fuse slot in my interior fuse box?
Avoid tapping into safety-critical circuits like airbags, ABS, or powertrain control modules; choose secondary circuits like the radio, cigarette lighter, or sunroof.
Which fuse should I plug the fuse tap into first: the original or the new one?
Insert the original fuse into the bottom slot of the tap to maintain the circuit's protection and place a lower-amperage fuse in the top slot specifically for your dash cam.
How do I ensure the hardwire kit is installed with the correct polarity?
Check your hardwire kit's manual for color-coded wires—typically yellow for battery, red for ignition, and black for ground—and verify with a voltmeter before final mounting.
Key Takeaways
- 1. how to hardwire dash cam with battery and ignition wire provides a focused, high-performance approach to addressing your specific needs in this category.
- 2. Reliability and consistency are the two most critical factors when integrating how to hardwire dash cam with battery and ignition wire into your routine.
- 3. A well-structured workflow or application method significantly enhances the long-term effectiveness of how to hardwire dash cam with battery and ignition wire.
- 4. Choosing solutions like how to hardwire dash cam with battery and ignition wire that are developed based on clear, transparent standards ensures better suitability for different use cases.
- 5. For optimal results, follow the recommended guidelines closely during the initial implementation phase of how to hardwire dash cam with battery and ignition wire.
- 6. Continuous monitoring of your progress allows for minor adjustments that lead to superior, sustainable outcomes with how to hardwire dash cam with battery and ignition wire.
- 7. how to hardwire dash cam with battery and ignition wire works most effectively when paired with a foundational understanding of the core principles involved.
Conclusion
Understanding how to hardwire dash cam with battery and ignition wire is a transformative step toward achieving professional vehicle security. By systematically managing your power sources and prioritizing electrical safety, you ensure your dash cam functions reliably in both driving and parking modes. This project not only enhances your security but also helps you develop a deeper understanding of your vehicle's systems, leading to more informed maintenance practices in the future.
As you move forward with your installation, remember that precision is your greatest asset. Take the time to route your cables carefully, secure your grounding points with care, and always test your settings under controlled conditions. With the right tools and a clear roadmap, you can enjoy a clean, automated, and highly effective surveillance solution that lasts for years to come.
Mastering the application of how to hardwire dash cam with battery and ignition wire ensures that your daily workflow remains highly efficient, consistent, and built to last.