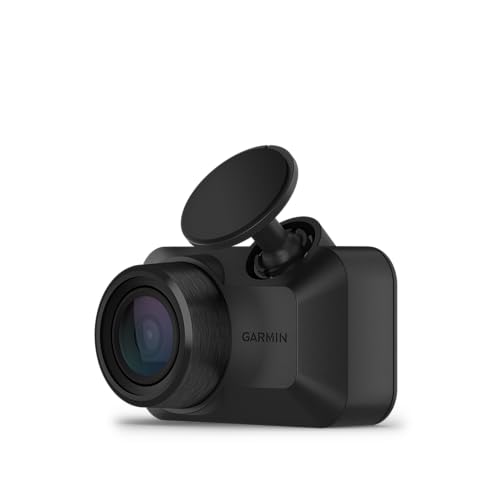
The Garmin Dashcam 57 represents a benchmark in compact, high-definition vehicle surveillance, offering drivers a robust solution for incident recording and situational awareness.
This guide is designed for both first-time owners and experienced users looking to optimize their dashcam settings. We assume a baseline familiarity with basic car electronics, but no specialized automotive engineering skills are required to follow these instructions.
By the end of this deep dive, you will be able to perform a professional-grade installation, configure high-fidelity video settings, and troubleshoot common operational inconsistencies with confidence.
- Understanding the hardware components of the Garmin Dashcam 57.
- Optimizing video resolution and field of view for maximum clarity.
- Step-by-step physical mounting and cable routing techniques.
- Configuring cloud features and local storage management.
- Advanced troubleshooting for persistent connectivity issues.
Overview & Prerequisites
Required Equipment and Tools
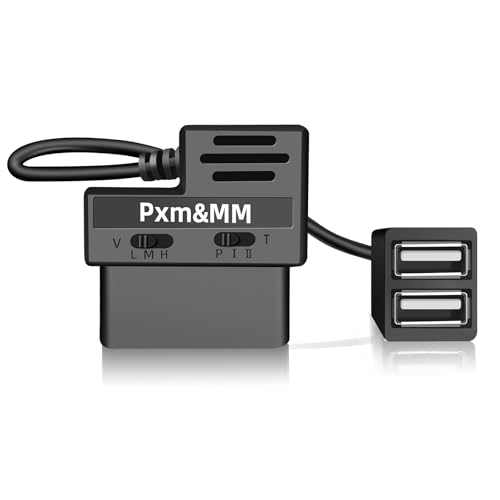
Before beginning, ensure you have the Garmin Dashcam 57 kit, which includes the magnetic mount, a long power cable, and a USB dual charger. You will also need a high-endurance microSD card (Class 10 or higher) for reliable recording. For those seeking professional installation tips, our DIY installation guide provides essential context for clean cable management.
Defining Your Setup Environment
Success depends on a clean windshield surface and an understanding of your vehicle’s power port locations. Ensure your vehicle’s 12V outlet or USB port provides power consistently, especially if you intend to use Parking Mode features. For vehicles without active cloud storage, you can maintain high security by following our guide on smart cameras without cloud reliance.
Core Concepts & Fundamentals
Understanding Incident Detection
The Garmin Dashcam 57 relies on an integrated G-sensor to detect rapid changes in velocity or direction. When a trigger event occurs, the camera automatically protects the current recording file, preventing it from being overwritten by the loop-recording function. This is critical for post-incident insurance reporting.
Field of View and Resolution Dynamics
With a wide 140-degree field of view, the 57 is engineered to capture peripheral activity. Understanding the balance between resolution (1440p) and storage space is vital. Recording at higher frame rates provides smoother playback of license plates but consumes space faster. Comparing traditional camera setups with specialized security models can be found in our 24-hour car security camera guide.
| Feature | Correct Approach | Incorrect Approach |
|---|---|---|
| Storage | High-Endurance microSD | Standard consumer SD |
| Placement | Behind Rearview Mirror | Center of visual field |
| Mounting | Cleaned Glass | Directly on dirty glass |
Step-by-Step Execution Guide

Phase 1: Initial Setup and Sync
Begin by pairing the device with the Garmin Drive app on your smartphone. This allows you to calibrate the lens position and confirm that the field of view captures both lanes of traffic. Ensure your firmware is updated via the app before finalizing the physical mounting.
Phase 2: Mounting and Wiring
Utilize the magnetic mount to test your positioning before applying the adhesive. Run the power cable along the headliner and down the A-pillar to keep the cockpit clean and safe from obstruction.
Recommended Equipment & Solution
Garmin Dash Cam 67W, 1440p and Extra-Wide
A reliable pick for Garmin Dash Cam 67W, 1440p, selected based on this article's guidance.

Garmin Dash Cam 57, 1440p and 140-degree
A reliable pick for Garmin Dash Cam 57, 1440p, selected based on this article's guidance.
Best Practices & Pro Tips
Maintaining Peak Performance
Regularly reviewing your footage ensures the camera is recording as expected. We recommend checking the device monthly, especially after extreme temperature fluctuations which can affect storage media.
Optimizing for Security
Troubleshooting & Common Pitfalls
Addressing Connectivity
If the device fails to sync with the mobile app, perform a hard reset by holding the power button for 10 seconds. For issues related to 24-hour monitoring, review our list of common dashcam fixes to rule out power-draw issues.
Failure Modes
Frequently Asked Questions
Does the Garmin Dashcam 57 need cloud storage?
A: No, it supports local storage via a microSD card, keeping your data private and independent of subscription services.
How long can the camera record in loop mode?
A: Recording time depends on the SD card capacity; a 128GB card typically holds many hours of 1440p footage before looping begins.
Will this drain my car battery?
A: If connected to a standard 12V port, it turns off when the car is off. Only hardwired setups draw power during parking.
Is voice control reliable?
A: Yes, the voice command feature is highly responsive for saving videos or taking pictures while keeping hands on the wheel.
Can I use it in extreme heat?
A: The device is built for automotive environments, but direct, prolonged desert sunlight can affect any electronic device's lifespan.
Does it record speed?
A: Yes, the embedded GPS tracks location and speed, which can be toggled on or off in the settings.
How do I view recorded clips?
A: Clips can be viewed directly through the Garmin Drive app or by inserting the SD card into a computer.
Is the mounting permanent?
A: The adhesive mount is semi-permanent, meaning it holds firm under heat but can be removed with adhesive remover when needed.
Key Takeaways
- 1 Proper mounting height ensures both traffic visibility and legal compliance.
- 2 High-endurance microSD cards are the single most important hardware purchase.
- 3 Regular firmware updates via the mobile app prevent known bugs.
- 4 The G-sensor protects vital footage during sudden braking or impacts.
- 5 Voice commands are a safe way to interact with the device while driving.
- 6 Hardwiring is necessary for true 24-hour parking security.
- 7 Consistent testing of video playback prevents "false security" scenarios.
Conclusion
The Garmin Dashcam 57 is a reliable, high-performance tool that adds a significant layer of security to your daily driving routine. By following the steps outlined in this guide, you ensure that your device is installed safely and optimized for peak reliability.
As you gain familiarity with the system, you may wish to experiment with advanced parking features or expanded storage options. Consistent maintenance and periodic testing remain the best ways to ensure your camera is ready when you need it most.
Stay safe on the road and keep your evidence secure; for more advanced hardware comparisons, check out our latest industry reviews.