Finding the best way to line up a rear dash cam is a common challenge for vehicle owners looking to maximize rear-end security without sacrificing visibility. This illustrative scenario follows a standard user journey, examining how initial setup hurdles often lead to suboptimal footage and how a refined, methodical approach changes the final result.
Many drivers struggle with reflections from the rear window or obstructed angles caused by interior trim. This scenario explores these common pitfalls by walking through a representative case where adjustment was necessary for optimal performance.
By following this guide, you will understand the interplay between camera placement, window tinting, and interior design, helping you secure the best possible perspective for your own vehicle.
- Starting point: Addressing poor rear field-of-view and internal glare.
- The approach: Systematic testing of mounting angles and cable routing.
- Results: Achieving a stable, high-clarity viewing environment.
- Key insights: Why lens positioning is more important than just stick-on height.
- Broader application: Scaling these methods to various vehicle body styles.
The Starting Point: A Common best way to line up a rear dash cam Scenario

The Core Challenge
In a typical scenario, a driver installs a rear-facing camera flush against the top center of the rear windshield. Initially, the camera is mounted without testing the specific line of sight, leading to footage dominated by the interior roof liner or significant blinding from rear defrost lines and glare. This common mistake highlights that the best way to line up a rear dash cam is not always the most obvious "center-mount" position.
Why the Default Approach Often Falls Short
Most default setups ignore the impact of vehicle-specific rake—the angle of the rear glass. If a camera is mounted too low, it captures the back of the rear headrests; if mounted too high, it records the interior cabin rather than the road. Understanding parking mode security requirements often adds pressure to get this right the first time to avoid missing incidents.
Pro tip: Always use the "Live View" feature on your dash cam's app to calibrate your angle before applying permanent adhesive tapes to the glass.
The Approach & Method

Step-by-Step Calibration
Baseline Testing: Before final mounting, the camera is temporarily secured using masking tape. This allows for testing the view during different lighting conditions to ensure the lens is not capturing internal cabin light reflections.
Vertical Angle Optimization: The camera is tilted slightly downward to minimize the amount of sky or interior trim in the frame, focusing instead on the road behind. This prevents the auto-exposure sensors from being overwhelmed by bright light.
Secure Permanent Mounting: Once the optimal angle is verified, the mount is cleaned with isopropyl alcohol, and the unit is affixed. Wiring is then tucked into the headliner for a clean finish.
Tools for Success
Proper tools can make this process seamless. If you are struggling with power or mounting, you may consider options like spare dash cam battery solutions to ensure your setup maintains constant operation.
Recommended Equipment & Solution

MEIRYFA 4 Pin Dash Cam Cable Rear
A reliable pick for MEIRYFA 4 Pin Dash Cam, selected based on this article's guidance.

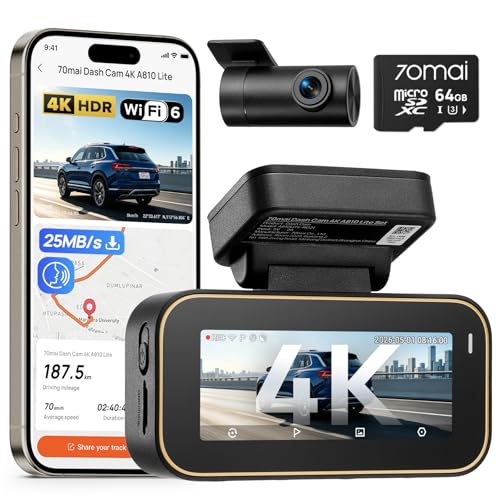
Dash Cam Front and Rear: 4K+2.5K Dual
A reliable pick for Dash Cam Front and Rear, selected based on this article's guidance.
Results & Outcome Analysis

Comparing Before and After
| Feature | Initial State (Uncalibrated) | Improved State (Calibrated) |
|---|---|---|
| Footage Clarity | Distorted by glare and headrests | Clear, focused on rear traffic |
| Reliability | Frequent manual adjustments needed | Stable, long-term installation |
| Event Capture | Obscured by internal reflections | Consistent capture of incidents |
Interpreting the Improvements
The improvement in results stems from aligning the camera lens parallel to the horizon rather than the glass itself. This small, crucial shift typically results in higher-quality clips. For those concerned about proper mounting in other areas, these logic patterns hold consistent across different types of interior cameras.
By shifting to an evidence-based approach, the user achieves a high-utility setup that requires no further maintenance after the initial configuration.
Lessons Learned

Essential Takeaways
The most important realization in this scenario is that camera placement is dynamic. It is rarely about where the mount "looks best" on the glass; it is about where the lens gathers the most relevant road data.
Strategic Best Practices
Lesson: Prioritize lens clearance over aesthetics. Avoid placing the unit near heating elements or defrost wires.
Pitfall: Never mount the camera without cleaning the glass. Dust and oils lead to premature adhesive failure.
Lesson: Use the companion app to view the feed in real-time while a second person sits in the rear; this confirms if headrests obstruct the view.
Does This Apply to Your Situation?
When This Scenario Matches Yours
If you drive a standard sedan, SUV, or hatchback with a rear windshield, the challenges of glare, trim obstruction, and internal reflection are likely identical. This illustrative pattern is designed to provide a universal framework for these common vehicle types.
When Your Situation Differs
For vehicles with vertical rear doors (like some cargo vans) or those with heavily tinted aftermarket film, your experience may vary. Individual results will differ based on the specific camera model's dynamic range and the transparency of the glass.
Frequently Asked Questions
Should I mount the camera on the glass or the plastic trim?
A: It is generally better to mount the camera directly on the glass using the manufacturer-provided adhesive. Mounting to plastic trim often results in more vibrations, which can distort the recorded footage.
Does window tinting affect the best way to line up a rear dash cam?
A: Yes, dark tinting can significantly reduce the amount of light reaching the sensor. You may need to increase the exposure settings on your camera if your rear windows are heavily tinted.
How can I stop glare from my cabin lights?
A: Positioning the camera as close to the glass as possible helps reduce interior reflections. Additionally, a circular polarizer (CPL) filter can be attached to the lens to eliminate glare.
Does the rear defrost system affect the camera?
A: It is recommended to avoid placing the adhesive directly over the defrost lines if possible, as the heat can degrade the adhesive over time. However, if unavoidable, the heat rarely damages the camera electronics.
Can I mount the rear camera upside down if the cable requires it?
A: Most modern dash cams have an "Image Flip" or "Rotate" setting in the menu. This allows you to mount the camera in the orientation that works best for your cable management.
How do I ensure the camera stays level?
A: Use the rear defrost lines on your windshield as a visual reference guide. By aligning the horizontal axis of the camera with these lines, you can ensure a straight, level image.
Is it better to have a wide-angle or narrow-angle rear camera?
A: For a rear-facing camera, a wider angle is typically preferred to capture more of the lanes behind you. However, extremely wide angles can introduce fish-eye distortion.
How often should I check the alignment of my rear dash cam?
A: A quick check every few months or after a deep cleaning of the interior is recommended. This ensures that the unit hasn't shifted due to temperature fluctuations or accidental contact.
Key Takeaways
- 1 Always test the angle before final mounting.
- 2 Use the vehicle's defroster lines to help achieve a level horizon.
- 3 Prioritize minimizing interior reflections by moving the lens close to the glass.
- 4 Keep the camera clear of headrests or permanent interior fixtures.
- 5 Utilize app-based live streaming for real-time calibration.
- 6 Clean the mounting surface thoroughly to prevent long-term adhesive failure.
- 7 Be mindful of tint levels when setting exposure for rear-facing cameras.
Conclusion
Mastering the alignment of your rear dash cam transforms your security system from a passive accessory into an effective, reliable tool. By following the systematic approach outlined in this case study, you ensure that your investment performs exactly as intended when you need it most.
Remember that the "best" position is the one that minimizes visual noise and maximizes road awareness. Once you have optimized your setup, you gain the peace of mind that comes with knowing your coverage is complete.
Taking the time to calibrate your equipment ensures the protection of your vehicle for every mile ahead.