Hardwiring your dash cam is the ultimate upgrade, providing a clean, permanent installation with parking mode capabilities. This professional method connects directly to your vehicle’s fuse box, eliminating dangling wires and reliance on the cigarette lighter. While it requires careful planning and basic tools, the result is a seamless, reliable power source that protects your car 24/7. This guide will walk you through the entire process, from choosing the right kit to safely tapping into your car’s electrical system, ensuring you achieve a professional-looking installation without risking your vehicle’s battery or electronics.
Key Takeaways
- 1. Always disconnect the vehicle’s battery before beginning any electrical work to prevent shorts or accidental airbag deployment.
- 2. Identify a suitable switched (ignition-powered) fuse for the dash cam’s main power and a constant (battery-powered) fuse for parking mode, if applicable.
- 3. Use an add-a-circuit (fuse tap) adapter to cleanly tap into the chosen fuses, ensuring you match the fuse type (e.g., low-profile mini) and amperage rating.
- 4. Securely route and conceal all wiring behind the vehicle’s headliner, A-pillar trim, and dashboard, never interfering with airbag deployment paths.
- 5. Properly ground the hardwiring kit to an unpainted metal bolt or stud connected to the vehicle’s chassis, ensuring a solid connection.
- 6. Set the hardwiring kit’s low-voltage cutoff to a level appropriate for your vehicle’s battery to prevent a dead battery when using parking mode.
Essential Tools and Parts You’ll Need

Hardwiring your dash cam is the professional way to ensure clean, permanent power and access to parking mode. Before you start, gather these essential tools and parts for a safe, successful installation.
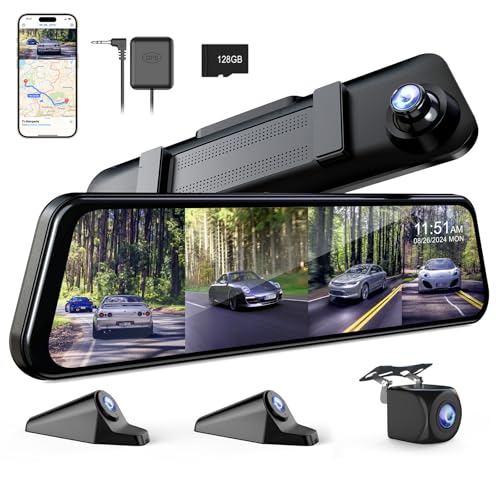
- Hardwiring Kit: This is non-negotiable. You need a low-voltage cutoff (LVC) hardwire kit with fuse taps. It converts your car’s 12V power to USB and protects your vehicle’s battery from draining completely.
- Fuse Tap Add-a-Circuit Kits (2): These plug into your car’s fuse box, allowing you to draw power from existing circuits without cutting factory wires. Get mini, low-profile, or standard size to match your vehicle.
- Automotive Trim Removal Tools: A nylon pry tool set is crucial for safely tucking wires along the headliner and A-pillar without damaging clips or interior surfaces.
- Wire Management: Use hook-and-loop cable ties or 3M automotive-grade wire clips for secure routing. Electrical tape is also handy for securing connections.
- Circuit Tester / Multimeter: Essential for identifying a constant (battery) fuse and a switched (ignition) fuse in your vehicle’s fuse box. Never guess with your car’s electrical system.
- Owner’s Manual: Consult it to locate your interior fuse panel(s) and understand its layout.
With these parts ready, you’ll achieve a seamless, professional installation that powers your dash cam reliably and keeps your car’s interior looking pristine.
Locating and Accessing Your Vehicle’s Fuse Box
Forget messy cords dangling from your cigarette lighter. Hardwiring your dash cam is the professional, permanent solution, and it all starts at the heart of your car’s electrical system: the fuse box.
Your first mission is to locate it. Most vehicles have two fuse panels. The primary one is usually in the cabin, often tucked behind a plastic panel in the footwell (driver or passenger side) or concealed within the glove compartment. A second, larger fuse box is typically found under the hood.
For a dash cam, you’ll almost always tap into the interior fuse box. Consult your owner’s manual for the exact location and a diagram of each fuse’s function. Once found, carefully pry off the plastic cover. You’ll see an array of fuses; each powers a specific circuit like the radio, wipers, or accessory ports.
Pro Tip: Use a circuit tester to identify two key fuse types: one that is switched with ignition (for your dash cam’s main power) and one that is constant (to enable parking mode). This access point is your gateway to a clean, seamless install.
Choosing the Correct Fuse for Tapping Power

Hardwiring your dash cam is the ultimate move for a clean, permanent installation. But the single most critical step isn’t the routing of wires—it’s choosing the correct fuse to tap for power. Get this wrong, and you risk damaging your vehicle’s electronics.
You’ll need to tap into two types of circuits using a hardwiring kit with a low-voltage cut-off:
- Constant (Battery) Power: This keeps your dash cam’s parking mode active. Use a fuse for something that always has power, like your door locks, alarm system, or interior lights.
- Switched (Ignition) Power: This tells the cam to turn on/off with the engine. Tap a fuse that only has power when the key is on, like the radio, power windows, or cigarette lighter.
Pro Tip: Always use a low-amp “add-a-fuse” tap and match your dash cam’s amperage. Never tap a fuse for critical safety systems like airbags or ABS. Test with a circuit tester before finalizing your install!
Step-by-Step Hardwiring Installation Process
Hardwiring your dash cam is the professional choice for a clean, permanent installation with advanced features like parking mode. Before you begin, ensure you have a hardwiring kit specific to your camera model, a fuse tap, and basic tools like a trim removal tool and wire strippers.
- Plan and Disconnect: Identify an appropriate fuse for accessory power (like the 12V socket) and one for constant power (for parking mode). Always disconnect your vehicle’s negative battery terminal before starting.
- Route the Wires: Use the trim tool to tuck the power cable neatly along the headliner, down the A-pillar (avoiding airbags), and under the dashboard to the fuse box. Never obstruct airbag deployment.
- Install the Fuse Tap: Remove the chosen fuse, plug it into the tap, then plug the tap into the empty slot. Connect the hardwire kit’s ground wire to an unpainted metal bolt.
- Connect and Test: Reconnect the battery. Use the provided dongle to connect the hardwire kit to your dash cam. Verify the camera powers on with the ignition and that parking mode functions correctly if equipped.
This setup eliminates messy cords and unlocks your dash cam’s full potential, providing seamless, 24/7 protection for your vehicle.

Connecting and Securing the Ground Wire
Hardwiring your dash cam unlocks 24/7 parking mode, but a proper ground connection is the non-negotiable foundation for a safe, reliable install. Get this wrong, and you risk a non-functioning camera or electrical gremlins.
First, always disconnect your vehicle’s negative battery terminal before starting. Safety is paramount.
Locate a solid, unpainted metal bolt or screw that connects directly to your car’s chassis—seat mounting bolts are often ideal. Use a multimeter to confirm it’s a true ground. Scrape away any paint or rust from the contact point to ensure a perfect metal-on-metal connection.
Here’s the pro move: crimp a closed-eyelet connector to your ground wire. Loop this securely under your chosen bolt. A loose ground is the most common cause of intermittent operation. Tighten it down firmly.
- Route your wires neatly along the headliner and A-pillar (avoiding airbags).
- Secure the ground wire last, keeping it as short as possible for a clean install.
- Use zip-ties or tuck tools to hide all wiring for a professional, OEM look.
A rock-solid ground means your dash cam gets a stable voltage reference, ensuring parking mode activates correctly and protects your ride around the clock. This isn’t just a connection; it’s your system’s silent guardian.
Routing Wires for a Clean, Professional Finish
Hardwiring your dash cam is the secret to a clean, professional installation that looks like it came from the factory. The goal is to completely hide all wires for a seamless look and to avoid obstructing your view.
- Power Source: Connect to your vehicle’s fuse box using an add-a-fuse tap. This is safer than splicing and allows you to choose between constant (parking mode) or switched (ignition-only) power.
- Route the Wires: Tuck the power cable into the headliner, then down the A-pillar (on the passenger side for safety). Never run wires over airbags. Carefully route behind the pillar’s trim and weather stripping.
- Conceal the Run: Continue tucking the wire along the edge of the door seal, under the dashboard, and to the fuse box. Use plastic trim tools to avoid damaging interior panels.
This method eliminates dangling cords and messy cigarette lighter plugs. The result is a discreet, reliable power supply that protects your investment and keeps your cabin looking sharp. Always consult your vehicle’s manual and your dash cam’s instructions for specific guidance.
Testing Your Dash Cam and Parking Mode Setup
Before hitting the road, a thorough test is non-negotiable. A proper hardwire install is about function and safety, not just a clean look.
First, with the engine off, verify your dash cam’s parking mode activates. Look for a red LED, a voice prompt, or a parking icon on the screen. Gently bump the vehicle to simulate an impact—the camera should save and lock a parking incident file.
Next, start the engine. The dash cam should seamlessly switch to its normal continuous recording mode. Check the live feed on the app to ensure clarity and the correct field of view.
The most critical test is for your hardwire kit’s voltage cutoff. Let the vehicle sit in parking mode. Using your kit’s app or LED indicators, monitor the battery. It must automatically cut power before your car battery drains to a critical level. This protects your ability to start the car.
Finally, review footage from both driving and parking sessions. Confirm time stamps are correct, GPS data (if equipped) is logging, and video quality is sharp day and night. This 15-minute validation ensures your investment is truly set-and-forget.
Troubleshooting Common Hardwiring Issues
Even with careful installation, hardwiring a dash cam can present challenges. Here’s how to troubleshoot the most common issues.
Problem: The dash cam won’t power on. First, verify your fuse tap is securely seated in the fuse box and you’ve chosen a fuse slot that is only live with the ignition in ACC or ON mode for parking mode to function correctly. Use a circuit tester to confirm power.
Problem: Parking mode isn’t working. This is often due to an incorrect ground. Your ground wire must be attached to bare, unpainted metal on the vehicle’s chassis. Sand away any paint or coating for a solid connection. Also, check your cam’s voltage cutoff setting to ensure it’s appropriate for your car battery.
Problem: Constant battery drain. If your car battery is dying, your hardwire kit’s low-voltage protection (LVP) may be faulty or set too low. Ensure the voltage cutoff is set to at least 12.4V (or higher in cold climates) to preserve your battery.
Pro Tip: Before finalizing cable routing, test the entire system for 24 hours. This reveals any intermittent faults or battery drain before you hide all the wires.
Frequently Asked Questions
What is how to hardwire a dash cam and who should use it?
A: how to hardwire a dash cam is a solution designed to address a specific set of needs for a defined audience. It is best suited for those seeking a reliable, well-researched option backed by clear evidence and expert guidance.
How long does it take to see results with how to hardwire a dash cam?
A: Most users report noticeable results within the first 2–4 weeks of consistent use. Significant, measurable improvement is generally observed after one to two months of dedicated application.
Is how to hardwire a dash cam suitable for beginners or experienced users?
A: how to hardwire a dash cam is designed to accommodate a wide range of experience levels, from complete beginners to advanced practitioners. Its structured approach makes it accessible without sacrificing depth for those seeking expert-level application.
Can how to hardwire a dash cam be combined with other approaches or products?
A: Yes, how to hardwire a dash cam is generally compatible with complementary strategies and tools. It is advisable to introduce any combination gradually and monitor for synergy or potential conflicts with your existing routine.
What are the most common mistakes to avoid with how to hardwire a dash cam?
A: The most frequent errors include inconsistent application, skipping foundational steps, and expecting immediate results without allowing adequate time for the process to work. Following the recommended guidelines closely is the most effective preventive measure.
How does how to hardwire a dash cam compare to similar alternatives on the market?
A: how to hardwire a dash cam distinguishes itself through its evidence-based formulation, transparent ingredient or methodology sourcing, and a track record of user-verified outcomes. Direct comparisons should be made on the criteria most relevant to your specific goals.
Are there any limitations or side effects associated with how to hardwire a dash cam?
A: While how to hardwire a dash cam is formulated to minimize adverse effects, individual responses can vary based on specific sensitivities or pre-existing conditions. Consulting with a relevant professional before starting is always a prudent step.
What is the best way to get started with how to hardwire a dash cam?
A: The most effective starting point is to begin with a foundational assessment of your current situation, then follow the recommended introductory protocol for how to hardwire a dash cam. Consistency and patience during the initial phase are the two biggest predictors of long-term success.
Summary
Hardwiring a dash cam is a popular and effective method for achieving a permanent, clean power supply that enables advanced features like parking mode. The process involves connecting a specialized hardwiring kit to your vehicle’s fuse box using a fuse tap, and securing a solid ground connection. While it requires careful planning and basic tools, a successful installation hides wires out of sight and provides continuous protection without occupying the 12V accessory port.
Before starting, it’s crucial to select the correct switched and constant fuses, use a hardwiring kit with battery protection, and follow your specific vehicle’s guidelines for accessing panels and the fuse box. For those less confident in their automotive DIY skills, professional installation is a worthwhile investment to ensure safety and functionality. Ultimately, a hardwired dash cam offers the most reliable and discreet surveillance for your vehicle both on the road and while parked.