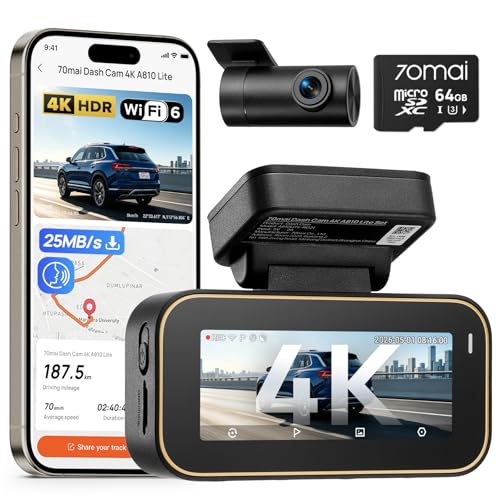
Dashcam Installation Cost: How Much You'll Pay & How to Save vs Alternatives is the primary consideration for drivers looking to protect their vehicles, as the choice between DIY setup and professional hardwiring significantly impacts your budget and system reliability.
Many vehicle owners find themselves at a crossroads: should they opt for the simplicity and low upfront cost of a "plug-and-play" setup, or invest in a professional, concealed hardwire installation? Understanding these costs involves more than just the sticker price of the camera; it includes labor, auxiliary hardware, and potential long-term maintenance implications.
This guide breaks down the financial and technical trade-offs between self-installation and professional service. By the end of this analysis, you will be able to determine which approach aligns with your technical comfort level, your vehicle's warranty requirements, and your total budget.
- Upfront costs of equipment vs. labor
- Time investment for DIY enthusiasts
- Warranty implications of hardwiring
- Long-term reliability and cable management
- Tool requirements for advanced setups
Overview & Head-to-Head Summary

DIY Setup: The Budget-Conscious Approach
DIY installation usually involves using the included 12V cigarette lighter adapter, which is simple, fast, and requires no modification to the vehicle's electrical system. This is the preferred method for those who frequently switch vehicles or those seeking to avoid any risk of voiding a manufacturer warranty.
Professional Installation: The Integrated Solution
Professional installation typically involves "hardwiring" the dashcam into the vehicle's fuse box. This allows the camera to record even when the ignition is off (Parking Mode) and hides all messy wiring behind interior panels for a factory-finished look.
| Feature | DIY Setup | Professional Install |
|---|---|---|
| Upfront Cost | Low (Equipment only) | High (Equipment + Labor) |
| Installation Time | 15-30 Minutes | 2-4 Hours |
| Aesthetics | Visible Wires | Hidden/Seamless |
| Parking Mode | Limited/None | Full Capability |
If you are exploring fleet options, refer to our comprehensive guide on Truck Dash Cam Systems: The Ultimate Guide to Protecting Your Fleet for insights into more robust, multi-camera setups.
Key Differences & Core Features

Cost Structure and Hidden Expenses
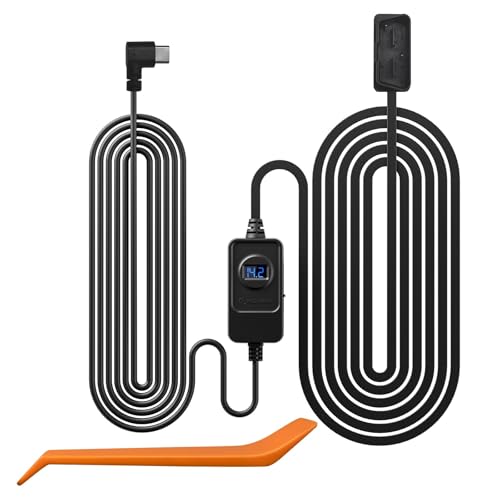
The cost difference isn't just labor; it's the hidden expense of necessary hardware. While DIY requires only the box contents, professional setups often demand a dedicated hardwire kit (often sold separately) and potential trim removal tools. The Is Redtiger F9 dash cam recommended? A Detailed Expert Review article highlights how different models impact the complexity of the installation process.
Safety and Cable Integrity
Professional installers ensure that cables do not obstruct airbags or interfere with sensitive vehicle electronics, a critical safety consideration. Conversely, DIY installs are at higher risk of cable sagging or pinching over time, which can compromise the feed from the rear camera unit.
| Consideration | DIY Approach | Pro-Installation |
|---|---|---|
| Insurance Premium | No Change | May offer discounts |
| Warranty Risk | Near Zero | Requires careful install |
| Cable Management | Manual/Basic | Professional/Hidden |
| Scalability | Easy to move | Fixed in place |
Performance & Real-World Analysis

Evaluating Power Reliability
Reliability comes down to consistent power delivery. DIY setups relying on cigarette ports are prone to disconnection if the plug is bumped. Professional hardwiring provides a constant, stable voltage that is essential for long-term usage.
Managing Long-term Maintenance
Professional installations generally offer better long-term reliability, especially if you reside in extreme climates that challenge electrical connections.
Best Use Cases & Ideal Scenarios

When Option A Makes More Sense
DIY is ideal for rental vehicles, older cars with simple electrics, or drivers who change vehicles every 1-2 years. It is also the preferred choice if you are on a strict budget and want to spend your money on a higher-quality camera instead of labor.
When Option B Makes More Sense
Professional installation is best for leased luxury vehicles, high-end fleet assets, or when utilizing high-resolution, multi-channel systems like those described in Top 5 Must-Have Accessories for WOLFBOX G930 10 Rear View Mirror Camera Review 2026.
When It Genuinely Doesn't Matter
If you have a secondary vehicle used for short trips and you only need basic dashcam coverage for accidental record-keeping, the simplicity of a DIY mount is perfectly adequate.
Final Verdict & Decision Framework

Quick Decision Checklist
Before deciding, ask: "Do I need the camera to record while I am away from the car?" If yes, professional hardwiring is almost always the required route to prevent battery drain and ensure continuous power.
Our Framework for Choosing
| Your Goal | Recommended Choice |
|---|---|
| Lowest Initial Cost | DIY |
| Parking Mode Security | Professional |
| Leased Vehicle Policy | DIY |
| Aesthetic/Clean Look | Professional |
Frequently Asked Questions
Can I do a professional-style install myself?
A: Yes, if you have experience with automotive trim removal tools and understand basic fuse tapping, you can achieve a professional look without the cost.
Will hardwiring void my car warranty?
A: Generally, no, provided the installation does not damage existing factory wiring. However, always consult your owner's manual before tapping into fuses.
How much does professional installation usually cost?
A: Prices typically range from $100 to $300 depending on the complexity of the wiring and the number of cameras being integrated.
Does a DIY install affect insurance?
A: Most insurance companies accept any functional dashcam regardless of installation method, but verify with your provider for specific policy requirements.
What is the most difficult part of dashcam installation?
A: The most challenging aspect is usually hiding the wiring along the A-pillar and roof lining without damaging the interior trim.
Can I move a hardwired camera to a new car?
A: Yes, but it requires removing the wiring from the fuse box and reinstalling it in the new vehicle, which essentially requires a full labor repeat.
What tools do I need for a DIY job?
A: At a minimum, you need plastic trim removal tools and potentially a voltage tester to identify the correct ignition-switched fuse.
Is rear camera installation harder?
A: Yes, running the cable from the front to the back of the car through the headliner is significantly more labor-intensive than the front camera setup alone.
Key Takeaways
- 1 DIY setups save significant money but require patience and careful handling.
- 2 Professional installation offers a cleaner look and enables advanced features like parking mode.
- 3 Hardware costs should include potential adapter kits, not just the camera.
- 4 Always verify that your installation choice doesn't violate your vehicle's warranty terms.
- 5 Parking mode utility often dictates whether a professional hardwire is necessary.
- 6 Safety is paramount; ensure wires never cross or restrict airbag deployment zones.
- 7 Your frequency of vehicle ownership change should heavily influence your choice of installation type.
Conclusion
Ultimately, the decision rests on whether you prioritize immediate cost savings or long-term system integration. If your vehicle is a long-term asset, investing in professional installation provides a peace of mind that a basic DIY setup often cannot match.
For those looking for more specific troubleshooting or performance insights, explore our 7 Common Problems with WOLFBOX G930 10 Rear View Mirror Camera Review 2026 to understand why professional integration can often solve connectivity issues before they start.
Choose the installation method that provides the best balance of safety, budget, and convenience for your specific lifestyle.
📌 Pillar Resource: Read our complete complete Dashcam Installation Cost: How Much You'll Pay & How to Save review for in-depth insights.