When upgrading your vehicle safety, choosing the right diy dashboard cam dual channel configuration requires a balance between ease of installation and comprehensive coverage. Many drivers struggle to decide between a bundled all-in-one system versus a modular approach where components are sourced independently.
The primary source of confusion lies in the trade-off between warranty support and customization. Integrated kits offer plug-and-play simplicity, while modular components allow for high-end optical sensors to be paired with specific recording hardware. Understanding these differences is essential for long-term satisfaction.
This guide breaks down the technical and practical requirements for both approaches. By the end, you will have a clear framework to evaluate your specific vehicle needs, power requirements, and budget constraints to make an informed purchase.
- System Compatibility: How components communicate across long cables.
- Installation Complexity: Managing interior panels versus simple suction mounts.
- Power Management: Understanding how these units draw energy from the vehicle battery.
- Video Fidelity: Assessing the quality trade-offs in multi-lens systems.
- Reliability Factors: Long-term stability in varying temperature environments.
Overview & Head-to-Head Summary
Integrated Dual-Channel Systems
Integrated systems are sold as a single package containing both a front and rear camera unit. These are engineered to work together, usually sharing a single power source and memory card. They are generally preferred by users who want a "set it and forget it" experience without managing disparate brands or specifications.
Modular Component Setups
Modular setups allow users to select a high-performance front camera and a separate, specific rear-facing sensor. This is common for users who prioritize specific features like interior cabin recording versus traditional rear-window surveillance. To learn more about how these are powered, see How are dash cams powered? The complete guide to installation methods.
| Feature | Integrated Kit | Modular Setup |
|---|---|---|
| Ease of Install | High | Moderate/Low |
| Compatibility | Guaranteed | User-Verified |
| Customization | Low | High |
| Warranty | Single Source | Multiple Sources |
If you are a first-time installer, start with an integrated kit to minimize cable management frustration and ensure signal integrity between cameras.
Key Differences & Core Features

Architectural Integration
The primary difference lies in the signal path. Integrated kits use proprietary wiring harnesses designed for specific lengths, which reduces signal degradation. Modular setups often require universal cabling, which may introduce interference if shielding is poor.
Cost and Value Perception
Integrated systems often provide better value in the short term, but modular systems allow for individual component upgrades over time. When budgeting, consider the labor costs outlined in How much installing a dash camera costs: A Complete Pricing Guide.
| Dimension | Integrated | Modular |
|---|---|---|
| Signal Stability | High | Variable |
| Upgrade Path | Limited | Extensive |
| Cable Routing | Optimized | Manual |
| Form Factor | Uniform | Mixed |
Performance & Real-World Analysis

Evaluating Data Integrity
Performance in dual-channel systems relies on stable throughput. Regardless of the choice, the memory card must support high-bitrate writes for both channels simultaneously. Always look for "High Endurance" cards to avoid data loss.
Thermal Management and Reliability
Dual-channel units generate more heat than single units. High-quality systems use aluminum heatsinks to manage this. Monitoring your camera's temperature behavior during summer months is a critical part of maintaining system health.
Consistent performance is achieved by prioritizing quality cabling and ensuring your camera is equipped with a capacitor rather than a lithium battery for better heat tolerance.
Best Use Cases & Ideal Scenarios
When Integrated Kits Make More Sense
Integrated kits are ideal for daily commuters and family vehicles where reliability and simplicity are paramount. Because these systems are designed to operate as a single unit, there is rarely a need for troubleshooting hardware conflicts.
When Modular Setups Make More Sense
Modular systems cater to enthusiasts who want specific sensor performance—such as a front camera with superior night vision paired with a low-profile interior-facing camera. This is helpful for those interested in 24/7 security as discussed in Do dash cams record when the car is off? Everything You Need to Know for 24/7 Security.
When It Genuinely Doesn't Matter
If you are a casual driver who only records for insurance purposes and rarely reviews footage, both methods are equally sufficient as long as they provide 1080p resolution and loop recording features.
Recommended Equipment & Solution

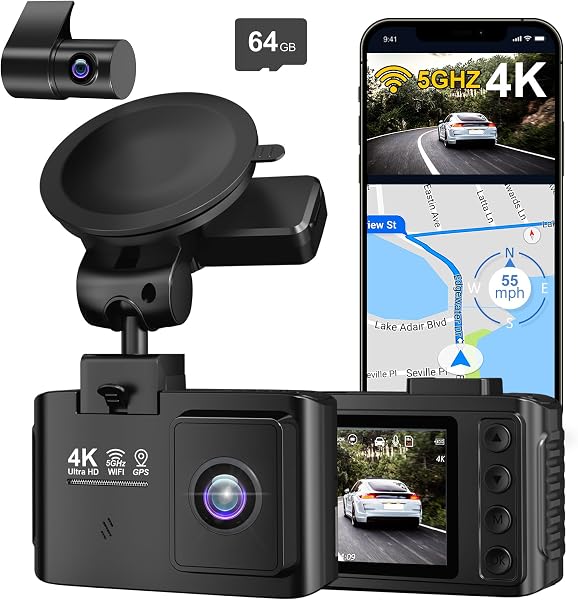
ROVE R2-4K Dual Dash Cam Front
A reliable pick for ROVE R2-4K Dual Dash Cam, selected based on this article's guidance.

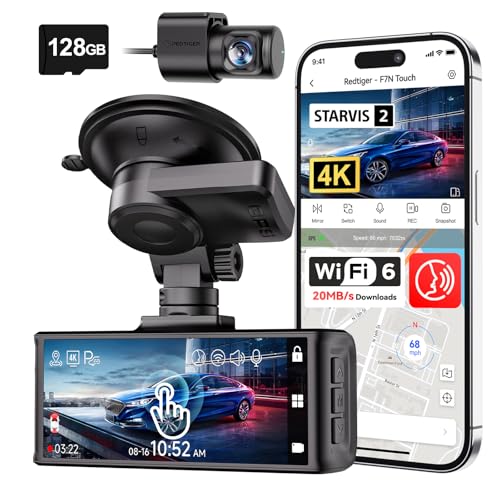
4K Dash Cam Front and Rear, Full
A reliable pick for 4K Dash Cam Front, selected based on this article's guidance.
Final Verdict & Decision Framework
Quick Decision Checklist
Before purchasing, ask yourself if you have the time to troubleshoot complex cable routing. If your answer is "no," stick to an integrated kit. If you have specific hardware requirements, modularity is the way forward.
Our Framework for Choosing
| Goal | Recommended Path |
|---|---|
| Total Convenience | Integrated Kit |
| Custom Sensor Needs | Modular Setup |
| Future Proofing | Modular Setup |
Frequently Asked Questions
Are dual-channel systems harder to install?
A: Yes, because you must route the rear cable through the vehicle's headliner, which requires trim removal tools and extra patience.
Can I mix and match different brands for a dual-channel setup?
A: It is highly discouraged as separate cameras usually lack the ability to sync video files or share a power cycle properly.
Do I need a hardwire kit for both channels?
A: Typically, a single hardwire kit connects to the front unit, which then provides power to the rear unit via a data/power cable.
Does dual-channel recording affect battery life?
A: Yes, dual recording uses more power, which is why proper fuse-tap installation is essential for parking mode functionality.
How do I hide the wires in a DIY installation?
A: Use interior trim removal tools to tuck cables into the weather stripping and headliner gaps for a clean, professional look.
Are rear cameras always waterproof?
A: No, verify if your rear camera is rated for exterior mounting if you plan to install it on the outside of your vehicle.
What is the best resolution for dual-channel cams?
A: 1440p for the front and 1080p for the rear is currently considered the optimal balance of quality and storage efficiency.
Can I use a single-channel camera as a rear unit?
A: Technically yes, but it won't be synced with the front, making it difficult to review incidents during playback.
Key Takeaways
- 1 Integrated kits simplify installation and maintenance for most users.
- 2 Modular setups allow for tailored sensor choices but increase complexity.
- 3 Always check the cable length included with your kit before purchasing.
- 4 High-endurance SD cards are required for dual-channel throughput.
- 5 Proper wiring routing is key to both performance and vehicle aesthetics.
- 6 Thermal management is critical for systems recording through two channels.
- 7 Your installation environment determines the success of a DIY project.
Conclusion
Selecting the right diy dashboard cam dual channel setup depends largely on your comfort level with vehicle modifications. For those who prioritize efficiency, integrated kits provide a stress-free experience that is ready to use immediately. Enthusiasts seeking specific performance markers will find modular setups allow for greater flexibility.
Remember that the quality of your installation is just as important as the hardware itself. Take your time during the setup process, ensure your cables are hidden securely, and choose an SD card capable of handling the write load of two channels simultaneously.
With the right preparation, you can achieve a professional-grade security setup in your own garage by following these principles. You can also explore Baby Car Camera Mounting Tips: Secure Setup Guide 2026 to see how mounting techniques apply to other interior car tech.