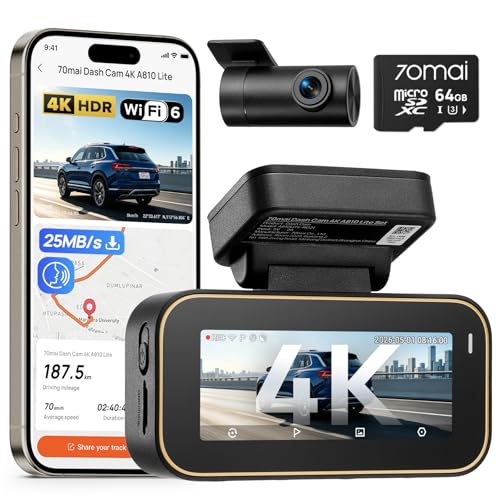
Deciding between How to Hardwire a Dash Cam: A Safe, Step-by-Step Guide vs Alternatives involves choosing between a permanent, integrated installation and the simplicity of plug-and-play convenience.
Many drivers find themselves at a crossroads when setting up their vehicle security: do they commit to the clean, constant power of hardwiring, or stick with the temporary ease of the cigarette lighter port? While hardwiring offers features like true 24/7 parking mode, it requires technical intervention. Conversely, using a 12V adapter is accessible to everyone but often results in cluttered cables and intermittent power cycles.
This guide breaks down the technical, financial, and practical implications of both methods. By the end, you will be able to determine which power path aligns with your vehicle's warranty, your DIY capabilities, and your specific security needs.
- Complexity: Permanent electrical integration vs. plug-and-play simplicity.
- Cable Management: Hidden wiring vs. visible, dangling accessory cords.
- Parking Mode: Constant monitoring capabilities vs. ignition-triggered recording.
- Vehicle Warranty: Assessing the risk of modifying factory circuits.
- Tool Requirements: Basic electrical testing vs. no tools required.
Overview & Head-to-Head Summary

Hardwiring: The Integrated Professional Choice
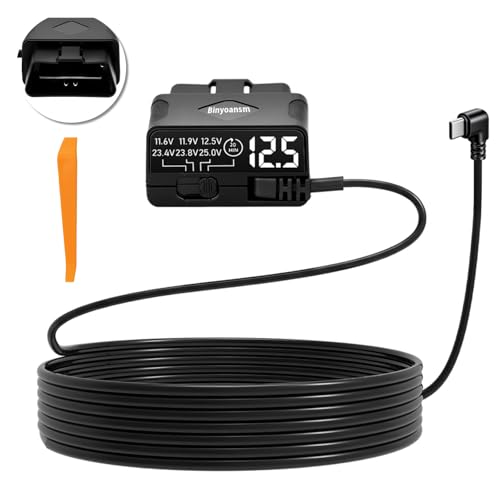
Hardwiring connects the dash cam directly to the vehicle's fuse box using a hardwire kit. This approach bypasses the cigarette lighter, allowing the camera to remain powered even when the engine is off, provided the kit has a low-voltage cutoff to prevent battery drain.
12V Port: The Accessibility Standard
Utilizing the standard 12V cigarette lighter port is the most common method for most users. It is reliable, requires zero electrical knowledge, and is completely reversible. However, it usually limits the dash cam to recording only while the vehicle is actively running.
| Feature | Hardwire Kit | 12V Adapter |
|---|---|---|
| Installation Time | 45–90 Minutes | 1–5 Minutes |
| Parking Mode | Full Capability | Limited/None |
| Cable Visibility | Hidden (Professional) | Visible (Cluttered) |
| Power Control | Always On/Ignition | Ignition Only |
If you are looking for advanced security features, check out our guide on Top 5 Must-Have Accessories for 24 Hour Car Security Camera to ensure your setup is fully optimized.
Key Differences & Core Features

Electrical Integrity and Safety
Hardwiring requires tapping into an existing fuse circuit. While safe when done correctly, it involves working with the vehicle's electrical system, which can be intimidating for novices. The 12V adapter, meanwhile, is designed as an external accessory, posing almost zero risk to the vehicle's internal wiring or sensitive electronic control units.
Long-Term Aesthetics and Functionality
Beyond technical differences, the aesthetic impact is significant. Hardwiring allows for a clean, factory-like look. The 12V adapter usually leaves a cord dangling across the dashboard, which may interfere with cabin cleanliness and potential safety features like passenger-side airbags if not routed carefully.
| Category | Hardwire Advantage | 12V Adapter Advantage |
|---|---|---|
| Setup | Clean cabin appearance | Instant deployment |
| Reliability | Constant power supply | No risk of battery drain |
| Compatibility | Works with most cameras | Universal vehicle support |
For those prioritizing privacy and local control, consider the hardware-side implications discussed in our Smart camera for car with no cloud guide.
Performance & Real-World Analysis
Evaluating Power Stability
Performance in dash cams is often tied to stable power delivery. Hardwire kits regulate voltage to protect the car battery, ensuring that if you leave the car for days, the camera doesn't strand you with a dead battery. 12V adapters are simpler but lack this intelligent management.
Assessing Ease of Use
Ease of use depends on your comfort with tools like a multimeter or fuse tap. Most users find that once a hardwire kit is installed, the "performance" is superior because it becomes a "set it and forget it" system.
Real-world performance consistently favors hardwiring for users requiring 24/7 surveillance, while 12V usage is adequate for daily commuters who only need incident recording while driving.
Best Use Cases & Ideal Scenarios

When Hardwiring Makes More Sense
Hardwiring is the superior choice if you live in high-density urban areas where hit-and-runs occur, or if you simply want the cleanest possible installation. It is also a prerequisite for many premium cameras like those reviewed in our Garmin Dashcam 57 Review.
When 12V Port Makes More Sense
This is ideal for leased vehicles where you cannot modify the electrical system, or for those who move their dash cam between multiple vehicles frequently.
When It Genuinely Doesn't Matter
If you have an electric vehicle with a dedicated USB/Cigarette power source that shuts off automatically after the car is locked, the difference between these methods becomes negligible for parking mode, as neither can easily access constant power without specific manufacturer-approved adapters.
Final Verdict & Decision Framework

Quick Decision Checklist
Ask yourself: Is the dash cam permanent or portable? If permanent, hardwire it. Do you need parking surveillance? Hardwire it. Is your car a lease or under a sensitive warranty? Use the 12V port.
Our Framework for Choosing
| Your Goal | Recommended Option |
|---|---|
| Max Security | Hardwire Kit |
| Zero Maintenance | 12V Adapter |
| Professional Look | Hardwire Kit |
| Leased Vehicle | 12V Adapter |
Frequently Asked Questions
Does hardwiring void my car warranty?
A: Generally, no, provided you use a fuse tap and do not cut or splice existing vehicle wires. However, always consult your dealership.
Can I install a hardwire kit myself?
A: Yes, with basic tools like a fuse puller and a voltage tester, most people can install a kit in under an hour.
Will hardwiring drain my car battery?
A: Most quality hardwire kits include a low-voltage cutoff that stops the camera once the battery reaches a specific threshold.
Is the 12V port method less reliable?
A: It is very reliable for ignition-based recording but lacks the sophistication of parking modes found in hardwire systems.
Do all dash cams support hardwiring?
A: Almost all modern dash cams support hardwiring, but you must ensure you have the correct power cable for your specific model.
What is a "switched" fuse?
A: A switched fuse only receives power when the ignition is in the "On" or "Accessory" position, preventing the camera from recording when you are not driving.
Does 12V power look messy in every car?
A: It depends on the placement of the outlet. Some cars have well-hidden ports, while others leave the cable exposed across the dash.
Are there alternatives to both?
A: Yes, some high-end cars offer built-in dash cam prep kits, and others use advanced battery packs that plug into the 12V port.
Key Takeaways
- 1 Hardwiring offers 24/7 parking mode security.
- 2 12V adapters are the easiest, non-permanent solution.
- 3 Always check your fuse box before starting any install.
- 4 Use a voltage tester to ensure you tap into the correct fuse.
- 5 Consider your lease agreements before making permanent changes.
- 6 Low-voltage cutoffs are essential for preventing battery drain.
- 7 Professional installation is available if DIY feels too daunting.
Conclusion
Choosing between hardwiring your dash cam and using a standard 12V adapter ultimately comes down to your need for 24/7 security versus the desire for a simple, removable setup. There is no one-size-fits-all answer, but by assessing your vehicle type and surveillance requirements, you can make an informed choice.
For more insights into optimizing your dash cam setup, including component reliability, explore our expert verdict on memory compatibility.
Take your time with the installation process; a clean setup pays dividends in both vehicle safety and peace of mind.
📌 Pillar Resource: Read our complete complete How to Hardwire a Dash Cam: A Safe, Step-by-Step Guide review for in-depth insights.