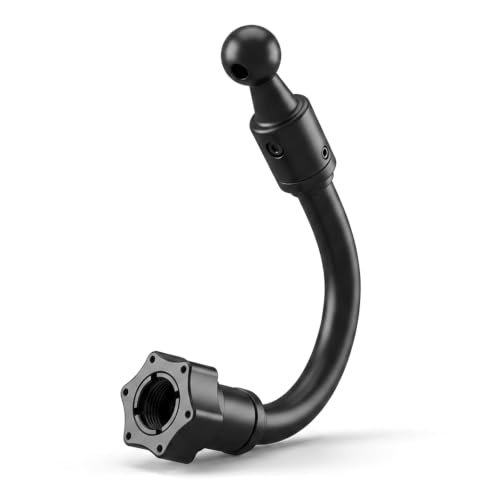
Learning how to setup & use best 360 camera car kit technology requires a systematic approach to hardware placement and software calibration. Whether you are seeking a full aftermarket surround view system or a simplified mount-based multi-cam setup, this guide provides the technical framework for professional results.
This guide is designed for automotive enthusiasts and DIYers who possess intermediate technical skills. We assume you are comfortable working with vehicle electrical systems and basic trim removal tools.
By the end of this guide, you will be able to perform a complete installation, calibrate camera stitching for a seamless bird's-eye view, and optimize your field of view for maximum safety and documentation clarity.
- Understanding the physics of fisheye lens distortion.
- Selecting the correct mounting points for blind-spot coverage.
- Wiring protocols for constant power vs. ignition power.
- Calibration cloth deployment and digital alignment.
- Troubleshooting image warping and stitching errors.
Overview & Prerequisites

Required Tools and Hardware
To begin, you will need a trim removal kit, a set of automotive-grade wire strippers, heat-shrink connectors, and your specific 360-degree camera kit. Ensure you have researched your vehicle's specific wiring diagrams before attempting any connection to the CAN-bus or infotainment system.
Understanding Installation Scope
The complexity of installing a 360-degree system varies by vehicle. For those looking for simpler alternatives, you might consider Looking For Dash Cam Without Smart Phone? Here Are the Best Simple Options to get started with basic recording before moving to advanced surround-view setups.
Always verify that your selected mount is compatible with your vehicle's exterior contour. If you are struggling with placement, reference Best Place To Position A Dash Cam: Optimal Mounting and Installation Tips to ensure your base cameras have the required clearance.
Core Concepts & Fundamentals

The Geometry of Stitching
A 360-degree view is not a single image, but a composite of four distinct wide-angle inputs. The "stitching" software relies on overlapping fields of view to blend these images into a single bird's-eye perspective. If your cameras are angled incorrectly, the software cannot align the pixels, resulting in phantom objects or jagged transitions.
Power Management and Integration
Integrating these systems often involves tapping into the reverse-trigger wire or the CAN-bus. Understanding whether your system requires constant power for "parking mode" or ignition-switched power is vital. For more context on how to compare these setups against competitors, see Best 360 Camera Car Kit — Top Surround View Systems and Mounts vs Top Competitors: Which is Best?
| Feature | Correct Approach | Incorrect Approach |
|---|---|---|
| Camera Angle | Pointing slightly downward at a 45-degree angle | Pointing horizontally, causing sky glare |
| Calibration | Using a standardized checkered mat | Eyeballing the alignment |
| Wiring | Using shielded cables for signal integrity | Unshielded generic wiring |
Step-by-Step Execution Guide

Phase 1: Physical Mounting
Phase 2: System Calibration
Recommended Equipment & Solution

360 Car Camera Panoramic Surround View System
A reliable pick for 360 Car Camera Panoramic Surround, selected based on this article's guidance.
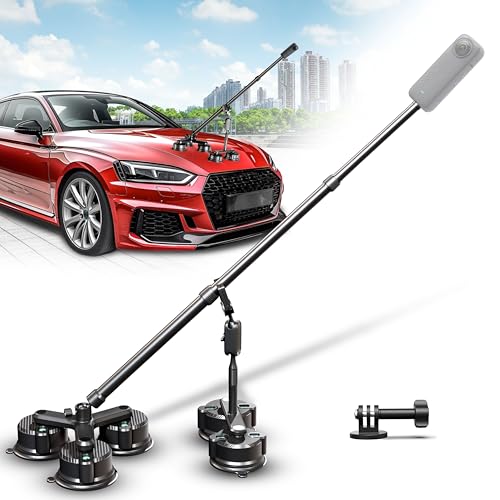
Insta 360 Car Mount Kit, 5 in
A reliable pick for Insta 360 Car Mount Kit, selected based on this article's guidance.
Best Practices & Pro Tips

Maintaining System Clarity
Regularly clean your camera lenses with a microfiber cloth and a gentle lens cleaner. Because these lenses are wide-angle and exposed to the elements, dust and grime accumulation will distort the stitching significantly faster than standard backup cameras.
Calibration Maintenance
Perform calibration on a level concrete surface to ensure the software's coordinate system is accurate to the real world.
Use automotive-grade cable ties to secure all internal wiring, preventing vibrations from inducing electrical noise.
If you perform major bodywork or change wheels, you may need to recalibrate the system to account for changes in ride height.
Troubleshooting & Common Pitfalls

Diagnostic Patterns
Most issues with 360 systems stem from signal interference or improper calibration. If your view is "wavy" at the seams, it is almost always a sign that the camera angles do not match the software configuration. For more installation advice, refer to Best way to line up a rear dash cam for perfect coverage and clarity.
Resolving Hardware Failures
Frequently Asked Questions
Can I install a 360 camera on an older car?
A: Yes, provided you have a compatible aftermarket head unit or a standalone monitor to display the video feed.
Do I need to drill holes in my bodywork?
A: Many kits offer stick-on mounts, though flush-mount or bracket-mount systems are generally more durable and secure.
Is the calibration process difficult?
A: It requires precision, but most modern systems include software guides that walk you through the process via an on-screen interface.
Will this void my vehicle warranty?
A: Tapping into factory wiring harnesses can potentially impact electrical warranties; consult your dealer before modification.
Can I use this for driving surveillance?
A: While designed for low-speed parking, some systems allow for continuous recording if integrated with a compatible DVR.
How long does the installation take?
A: An experienced installer can finish in 3-5 hours, while beginners should allocate a full weekend for routing and testing.
What happens if a lens gets scratched?
A: Most manufacturers sell replacement camera modules that can be swapped without replacing the entire harness.
Can I see at night?
A: Yes, provided your kit includes cameras with IR-cut filters or high-sensitivity low-light sensors.
Key Takeaways
- 1 Always perform a "dry run" of the wiring before final installation.
- 2 Use calibration mats on a flat, even surface for optimal stitching.
- 3 Protect all wiring connections with waterproof heat-shrink.
- 4 Regularly clean external lenses to maintain image quality.
- 5 Verify head unit compatibility before purchasing a kit.
- 6 Mounting cameras at identical heights improves stitching results.
- 7 Document your wiring path for easier future troubleshooting.
Conclusion
Mastering the setup of a 360-degree camera system transforms your vehicle's safety profile, offering unparalleled spatial awareness in tight spots. By following the systematic approach of mounting, routing, and precise calibration, you ensure the system operates at its full potential.
Remember that the quality of your installation is directly proportional to the patience you invest in the calibration phase. Whether you are using a professional kit or a custom solution, keep your sensors clean and your connections secure.
Take your time with the initial setup, and your 360-degree vision will provide years of reliable, safer driving.
📌 Pillar Resource: Read our complete main Best 360 Camera Car Kit — Top Surround View Systems and Mounts guide for in-depth insights.