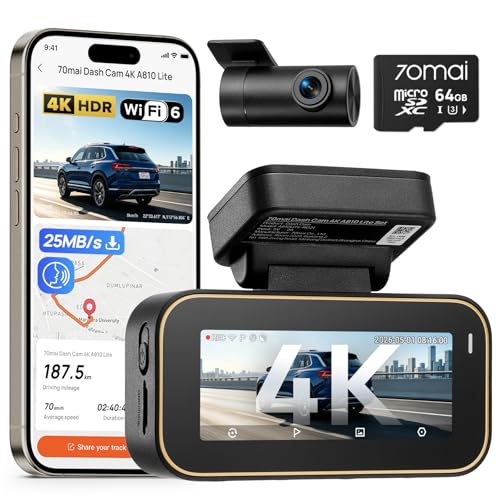
Learning how to setup & use how to hardwire a dash cam: a safe, step-by-step guide allows you to move beyond basic cigarette lighter adapters and achieve a clean, professional, and reliable installation for constant 24/7 security.
This guide is designed for car owners and DIY enthusiasts who possess basic mechanical intuition. It assumes you are comfortable working with simple electrical components and have access to basic tools like a trim removal set, a multimeter, and a fuse tap kit.
By the end of this guide, you will be able to identify the correct fuse circuits, safely route power cables behind interior panels, and configure your camera settings to ensure your vehicle is monitored without draining the starter battery.
- Understanding vehicle fuse box layouts and "always-on" vs "switched" power.
- Safe cable routing techniques to avoid interfering with airbag deployment.
- The importance of selecting the correct hardware kit for your specific camera model.
- Step-by-step instructions for grounding and tapping into the fuse box.
- Essential testing procedures to verify system functionality before closing up panels.
Overview & Prerequisites

Required Tools and Components
To successfully perform this installation, gather your hardwire kit, a voltage multimeter, a fuse tap, a vehicle-specific fuse chart, and plastic panel pry tools. Always verify your SD card compatibility before finalizing the installation to ensure the camera records consistently.
Who Should Perform This Work
This procedure is intended for those comfortable with vehicle electrical systems. If you have recently upgraded your heavy equipment rear view camera or are familiar with minor interior modifications, this task will be straightforward. If you are unsure about identifying sensitive circuits, consider professional installation.
Core Concepts & Fundamentals

Understanding Power Types
Hardwiring relies on two power signals: ACC (switched) and Constant (battery). Switched power only provides electricity when the ignition is on, while Constant power provides power continuously, allowing for parking mode. Learning how to hardwire a dash cam: a safe, step-by-step guide effectively requires distinguishing between these two to prevent battery drain.
Safety and Cable Routing
Proper routing involves hiding wires behind A-pillars and weather stripping. It is critical to ensure cables do not run across airbag deployment zones, as this could impede safety mechanisms during an emergency.
| Model | Correct Approach | Incorrect Approach |
|---|---|---|
| Fuse Tapping | Using a dedicated fuse tap on a non-critical circuit. | Wrapping wires around existing fuse prongs. |
| Grounding | Attaching to a clean, unpainted metal chassis bolt. | Attaching to a plastic bracket or painted surface. |
Step-by-Step Execution Guide

Preparation and Circuit Identification
Before installing, use your multimeter to find a switched circuit and a constant circuit. Map these out against your fuse box diagram to ensure you aren't tapping into mission-critical systems like the ECU or fuel pump.
The Installation Process
Recommended Equipment & Solution

MASIGO Dash Cam Hardwire Kit with Car
A reliable pick for MASIGO Dash Cam Hardwire Kit, selected based on this article's guidance.
Best Practices & Pro Tips

Maintaining Long-Term Reliability
Regularly check the integrity of your fuse taps and connections. When you understand how to setup & use how to hardwire a dash cam: a safe, step-by-step guide, you recognize that environmental heat and vibration in vehicles can loosen connections over time.
Optimizing for 24/7 Monitoring
Troubleshooting & Common Pitfalls

Solving Connectivity Issues
If the dash cam fails to power up, first check the ground connection. Many users skip the step of verifying the ground on an unpainted surface, leading to frustration. Always verify your dash cam hardware is correctly seated in the cradle.
Addressing Power Cycling
Frequently Asked Questions
Q: Can I use a cigarette lighter for the hardwire connection?
A: No, that defeats the purpose of "hardwiring" and often results in an unsightly cable.
Q: Will this void my car warranty?
A: Generally, modern manufacturers allow accessories, but check your manual regarding electrical system modifications.
Q: What is the benefit of hardwiring?
A: It provides a clean, hidden look and enables 24/7 recording features without occupying your accessory port.
Q: How do I know which fuse is constant?
A: Use a multimeter; a constant fuse will show 12V even with the ignition keys removed.
Q: Can I hardwire multiple cameras?
A: Yes, provided the total current draw does not exceed the capacity of your circuit or the hardwire kit's rating.
Q: Is it safe to leave my dash cam on overnight?
A: Yes, provided you have a battery discharge prevention device installed with the hardwire kit.
Q: What if I don't have a multimeter?
A: You can use a 12V circuit tester (test light), though a multimeter is more accurate for reading specific voltages.
Q: Where do I find the fuse box?
A: Consult your vehicle owner's manual under "Fuses and Relays" to find the interior box location.
Key Takeaways
- 1 Always research vehicle-specific fuse box diagrams before beginning.
- 2 Use a multimeter to verify circuits before finalizing connections.
- 3 Prioritize safety by never obstructing side-curtain airbags.
- 4 Ground the device to a clean, unpainted metal surface on the chassis.
- 5 Configure cut-off voltage to preserve your starter battery.
- 6 Test all functionality before re-installing your interior trim.
- 7 Use high-endurance memory cards for 24/7 security applications.
Conclusion
Successfully mastering how to setup & use how to hardwire a dash cam: a safe, step-by-step guide is a highly rewarding project that elevates your vehicle security. By focusing on safe circuit identification and clean cable management, you create a professional-grade monitoring system that works while you sleep.
Remember that the quality of your installation is directly reflected in the reliability of your surveillance. If you encounter issues, revisit your connections and ground point before seeking external help. For more advanced setups, such as integrating additional road safety devices, keep your installation tidy and your documentation stored for future troubleshooting.
A safe, hardwired dash cam installation provides peace of mind that justifies the afternoon spent in the garage.
📌 Pillar Resource: Read our complete main How to Hardwire a Dash Cam: A Safe, Step-by-Step Guide guide for in-depth insights.